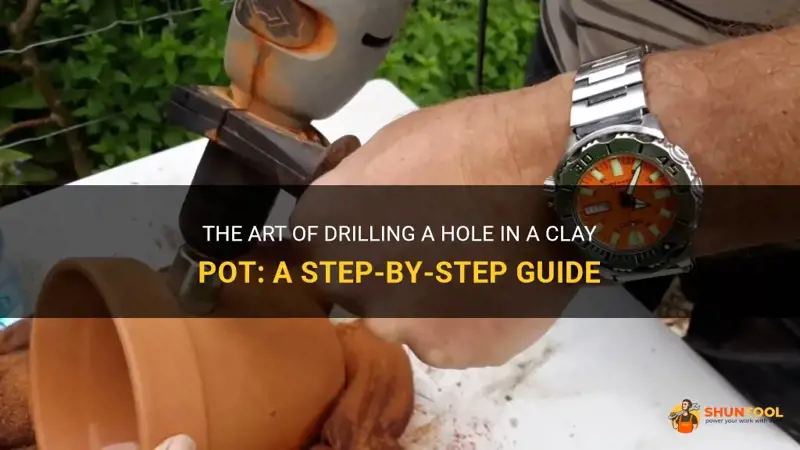
Have you ever wanted to add a hole to a clay pot but didn't know where to start? Drilling a hole in a clay pot may sound intimidating, but it's actually a straightforward process that can be done with a few simple tools. Whether you're an avid gardener looking to improve drainage or a crafty individual wanting to repurpose a pot, this guide will walk you through the steps to create a hole in a clay pot with ease. So, grab your drill and let's get drilling!
| Characteristics | Values |
|---|---|
| Material of pot | Clay |
| Type of drill bit | Masonry or ceramic drill bit |
| Drill type | Cordless or electric drill |
| Drill speed | Low to medium |
| Water or lubricant | Use water or clay-friendly lubricant |
| Drill technique | Apply gentle and even pressure |
| Drill depth | As per requirements or project |
| Safety precautions | Wear safety glasses and gloves |
What You'll Learn
- What tools do I need to drill a hole in a clay pot?
- What type of drill bit is best for drilling into clay?
- Are there any specific techniques or tips for drilling into clay pots without cracking them?
- Should I soak the clay pot in water before drilling to make it easier?
- Are there any safety precautions I should take while drilling into a clay pot?
![]()
What tools do I need to drill a hole in a clay pot?
Clay pots are a popular choice for planting flowers and small shrubs due to their natural, rustic beauty. However, if you want to create drainage holes in your clay pot to prevent waterlogging, you'll need some specific tools. In this article, we'll discuss the tools needed to drill a hole in a clay pot and provide a step-by-step guide on how to do it.
Tools you'll need:
- Power drill: A power drill is essential for drilling a hole in a clay pot. It's recommended to use a cordless drill with a variable speed setting for better control.
- Diamond-tipped or carbide drill bit: Ordinary drill bits are not suitable for drilling through clay pots. Diamond-tipped or carbide drill bits are specifically designed for drilling through hard materials like ceramics and stoneware. They are more durable and will give you clean, precise holes.
- Masking tape: Masking tape is used to create a guide for drilling. It helps prevent the drill bit from slipping or wandering, ensuring that the hole is accurately placed.
- Safety glasses: Safety should always be a priority when working with power tools. Wear safety glasses to protect your eyes from flying debris or accidentally shattering the pot.
Step-by-step guide:
- Prepare your clay pot: Clean the pot and make sure it's dry. If there are any cracks in the pot, it's recommended to repair them before drilling the hole. This will prevent the pot from breaking during the drilling process.
- Mark the desired location: Choose a spot on the pot where you want the hole to be drilled. Use a marker or masking tape to mark the exact position. Make sure it's centered and at least one inch away from the pot's edge to avoid potential cracking.
- Secure the pot: Place the pot on a stable surface or secure it in a clamp to prevent it from moving during drilling. This will ensure stability and accuracy while drilling the hole.
- Apply masking tape: Apply a strip of masking tape over the marked position. This will act as a guide for the drill bit and prevent it from slipping.
- Start drilling: Insert the diamond-tipped or carbide drill bit into the drill chuck. Set the drill to a low speed setting and start drilling slowly at the marked spot. Apply gentle, even pressure to prevent the pot from cracking. Do not rush the process and let the drill do the work.
- Keep the drill bit cool: Drilling through ceramics generate heat, which can damage the drill bit. To keep the drill bit cool, it's recommended to periodically dip it in water or use a spray bottle to cool it down. This will prolong the life of the drill bit and prevent it from getting too hot.
- Finish drilling: Continue drilling until you've reached the desired depth. Once the hole is complete, remove the drill and wipe away any excess dust or residue.
- Test the hole: Before planting anything, it's a good idea to test the drainage by pouring water into the pot. If the water drains properly, you've successfully drilled a hole in your clay pot.
Remember to always take your time and work carefully when drilling a hole in a clay pot. Follow the safety guidelines and use the recommended tools to ensure a successful outcome. Now that you're equipped with the necessary knowledge and tools, you can confidently drill a hole in your clay pot to provide proper drainage for your plants.
Using a Regular Drill for Concrete: Is it Possible?
You may want to see also
![]()
What type of drill bit is best for drilling into clay?
When it comes to drilling into clay, choosing the right drill bit is crucial in ensuring success. Clay is known for being dense and heavy, which can make drilling into it a challenging task. However, by using the appropriate drill bit and following certain techniques, it is possible to drill into clay with relative ease.
The best type of drill bit for drilling into clay is the masonry drill bit. Masonry drill bits are specifically designed for drilling into tough materials such as clay, concrete, and stone. They feature a carbide tip that can withstand the high torque and abrasion caused by drilling into dense materials. The carbide tip is much harder than the clay, which allows it to penetrate the surface effectively.
When using a masonry drill bit, it is important to ensure that it is suitable for the specific type of clay you are drilling into. Different types of clay may have varying levels of density and hardness, so using the right drill bit is essential to achieve the desired results. It is recommended to consult with a professional or do some research to determine the best drill bit for your specific clay type.
In addition to selecting the right drill bit, there are a few techniques that can help make drilling into clay easier. Here are the step-by-step instructions to drill into clay:
- Prepare the drilling area: Before starting to drill, clear the area of any debris or dirt. This will ensure a clean drilling surface and prevent any obstructions that may affect the drilling process.
- Mark the drilling spot: Use a marker or pencil to mark the exact spot where you want to drill. This will help guide your drill and ensure precision.
- Use a pilot hole: To make drilling into clay easier, start by creating a pilot hole. A pilot hole is a small hole made with a smaller drill bit that will act as a guide for the larger masonry drill bit. This will help prevent the larger drill bit from slipping or wandering off course.
- Choose the appropriate drill speed: When drilling into clay, it is important to use the appropriate drill speed. Too high of a speed can cause the clay to crack or chip, while too low of a speed may result in ineffective drilling. Start with a moderate speed and adjust as needed.
- Apply steady pressure: When drilling into clay, it is essential to apply steady pressure to the drill. Pressing too hard can lead to the drill bit getting stuck or breaking, while not applying enough pressure may result in slow drilling progress. Find a balance and maintain a consistent pressure throughout the drilling process.
- Use water as a lubricant: Clay can generate a lot of heat when drilled, which can cause the drill bit to overheat and lose effectiveness. To prevent this, it is recommended to use water as a lubricant. Spray a small amount of water onto the drilling spot as you drill to keep the clay cool and prevent excessive heat buildup.
By following these steps and using the appropriate masonry drill bit, drilling into clay can be a manageable task. Always remember to wear appropriate safety gear, such as goggles and gloves, and take the necessary precautions to ensure a safe and successful drilling process.
In conclusion, when it comes to drilling into clay, using a masonry drill bit is the best choice. The carbide tip of the masonry drill bit is specifically designed to handle the density and hardness of clay. By following the recommended techniques and steps, such as creating a pilot hole and using water as a lubricant, drilling into clay can be done effectively and efficiently.
Understanding the Permissibility of Drilling Holes in Floor Joists for Plumbing
You may want to see also
![]()
Are there any specific techniques or tips for drilling into clay pots without cracking them?
Drilling holes in clay pots is a common practice for gardeners and hobbyists alike. It allows for proper drainage and aeration of the soil, which is essential for the health of plants. However, drilling into clay pots can be challenging, as the material is prone to cracking and breaking. In this article, we will explore some specific techniques and tips that can help you drill into clay pots without damaging them.
- Choose the right drill bit: The type of drill bit you use can make a significant difference in preventing cracks. It is recommended to use a masonry drill bit specifically designed for drilling into ceramics and pottery. These drill bits have a carbide tip that helps to cut through the clay without causing excessive pressure and stress.
- Mark the drilling spot: Before you start drilling, make sure to mark the spot where you want to drill the hole. This will help you to drill precisely and reduce the chances of slipping or cracking the pot.
- Use water as a lubricant: Clay pots tend to crack when subjected to excessive heat and friction. To reduce friction and keep the temperature down, use water as a lubricant while drilling. Simply dip the drill bit into a container of water every few seconds to keep it cool.
- Start at a slow speed: When drilling into clay pots, it is essential to start at a slow speed. This allows the drill bit to gradually penetrate the material without putting too much stress on it. Once you have successfully created a small hole, increase the speed gradually to speed up the drilling process.
- Apply consistent pressure: It is crucial to apply consistent pressure while drilling to avoid cracking the clay pot. Applying too much pressure can lead to excessive stress on the pot, while too little pressure can cause the drill bit to slip, which also increases the risk of cracking. Find a balance and maintain a steady pressure throughout the drilling process.
- Drill from the inside out: To minimize the chances of cracking, it is recommended to drill from the inside of the pot outwards. This allows the pot to have more stability and support while drilling. If you try to drill from the outside in, the pot may flex or break under pressure.
- Use a backing material: Placing a piece of scrap wood or a block of foam inside the pot can provide additional support while drilling. This helps to distribute the pressure evenly and reduce the risk of cracking. Make sure the backing material is positioned directly beneath the drilling spot.
These techniques and tips can significantly increase the chances of successfully drilling into clay pots without cracking them. Remember to take your time and be patient while drilling, as rushing the process can lead to mistakes. With practice and a steady hand, you will be able to create clean and precise holes in your clay pots for proper drainage and airflow.
Exploring the Benefits of Using a Hammer Drill for Your DIY Projects
You may want to see also
![]()
Should I soak the clay pot in water before drilling to make it easier?
When it comes to drilling holes in clay pots, there is a common belief that soaking the pot in water beforehand can make the drilling process easier. However, this practice is not always necessary or advised. Whether or not to soak a clay pot before drilling depends on several factors, including the type of clay, the size of the pot, and the tools being used.
There are two main types of clay pots: terracotta and ceramic. Terracotta pots are made of a porous clay material that absorbs water, while ceramic pots are typically coated with a glaze that makes them waterproof. If you have a terracotta pot, soaking it in water before drilling can help to soften the clay and make it easier to drill into. However, for ceramic pots, soaking is not necessary as the water will not be absorbed by the glaze.
The size of the pot also plays a role in determining whether or not soaking is necessary. Smaller pots, such as those used for planting herbs or small flowers, may not require soaking as they are easier to drill into. Larger pots, on the other hand, can be more challenging to drill into and may benefit from soaking to soften the clay.
The tools being used also impact whether or not to soak the pot. If you are using a regular drill with a masonry or carbide-tipped drill bit, soaking the pot may not be necessary as these drill bits are designed to cut through clay and other hard materials. However, if you are using a less powerful tool, such as a hand drill or a rotary tool, soaking the pot can make drilling easier and reduce the risk of cracking the clay.
If you decide to soak the clay pot before drilling, here is a step-by-step guide on how to do it:
- Fill a basin or bucket with enough water to completely submerge the pot.
- Place the pot in the water, making sure it is fully immersed.
- Allow the pot to soak for at least 30 minutes to an hour, or longer for larger pots.
- Remove the pot from the water and gently tap off any excess moisture.
- Mark the desired location for the hole on the pot using a marker or tape.
- Secure the pot on a stable surface, such as a workbench or table.
- Start drilling slowly, applying moderate pressure to the drill bit.
- Keep the drill bit lubricated with water or a drilling lubricant to prevent overheating.
- Continue drilling until the desired hole is achieved, periodically releasing pressure to clear any clay debris.
- Once drilling is complete, carefully wipe away any excess moisture and let the pot dry before handling or planting.
While soaking the clay pot can make drilling easier, it is important to note that it does not guarantee success. Drilling into clay pots can be challenging, and there is always a risk of cracking or breaking the pot. Therefore, it is essential to take your time, use the appropriate tools, and exercise caution throughout the process.
In summary, soaking a clay pot in water before drilling can be beneficial in certain circumstances. It can help to soften the clay and make it easier to drill into, especially for larger pots or when using less powerful tools. However, it is not necessary for ceramic pots or when using masonry or carbide-tipped drill bits. If you decide to soak the pot, follow the step-by-step guide provided and remember to proceed with caution to avoid damaging the pot.
A Step-by-Step Guide on Installing Shades Without Drilling
You may want to see also
![]()
Are there any safety precautions I should take while drilling into a clay pot?
Drilling into a clay pot can be a useful technique for creating drainage holes or adding decorative elements to your pots. However, it is important to take certain safety precautions to ensure a successful and safe drilling experience. By following these guidelines, you can avoid accidents and achieve the desired results when drilling into clay pots.
- Wear Safety Gear: The first step is to ensure you are wearing appropriate safety gear, including safety goggles and gloves. This will protect your eyes from flying debris and your hands from potential injuries.
- Use a Drill with a Masonry Bit: When drilling into clay pots, it is essential to use a drill with a masonry bit. These bits are specifically designed for drilling into hard materials like clay and can provide clean and precise holes.
- Mark the Spot: Before drilling, mark the spot where you want to create the hole on the clay pot. This will help you stay focused and prevent any accidental slips or mistakes.
- Start Slowly: Once you have marked the spot, start drilling slowly at a low speed. This will prevent the clay pot from cracking under the pressure of the drill. Applying too much force or drilling too fast can cause the pot to break.
- Apply Steady Pressure: As you drill, make sure to apply steady pressure without leaning too heavily on the pot. This will ensure a controlled and even drilling process. Avoid jerky movements that can disrupt the drilling process and potentially damage the pot.
- Cool the Drill Bit: Clay can generate a significant amount of heat when drilled. To prevent damage to the pot and the drill bit, periodically remove the bit from the hole and cool it in water before continuing. This will help prolong the life of the drill bit and prevent heat-related issues.
- Keep the Pot Stable: To prevent the clay pot from moving while you drill, secure it in place using clamps or other stabilizing tools. This will provide a stable surface for drilling and reduce the risk of accidents caused by a shifting pot.
- Clean the Pot: After drilling, it is important to clean the pot to remove any clay dust or debris. This can be done by gently rinsing the pot with water or using a soft brush. Cleaning the pot will ensure that your plants are not exposed to any harmful particles that could affect their health.
- Practice on a Test Piece: If you are new to drilling into clay pots, it is a good idea to practice on a test piece before drilling into your valuable or decorative pots. This will give you an opportunity to familiarize yourself with the drilling process and adjust your technique if necessary.
In conclusion, drilling into clay pots can be a safe and effective way to customize and improve your gardening experience. By following these safety precautions, you can enjoy the benefits of drilling while minimizing the risk of accidents or damage to your clay pots. Happy drilling!
The Concerning Cost of Drilling a Fracking Well Revealed
You may want to see also
Frequently asked questions
To drill a hole in a clay pot, you will need a power drill with a masonry drill bit. Depending on the size of the hole you want to make, you may also need a smaller drill bit for a pilot hole. Additionally, it is important to have safety goggles and gloves to protect yourself from any flying debris.
To prevent the clay pot from cracking while drilling, it is important to take some precautions. First, make sure the pot is dry, as drilling into moist clay can cause it to crack. Secondly, start by making a small pilot hole with a smaller drill bit, gradually working your way up to the desired size. Apply gentle and even pressure while drilling, and try to keep the drill bit perpendicular to the surface of the pot. Using a slow speed setting on your drill can also help to prevent any unnecessary stress on the clay.
It is recommended to use a masonry drill bit specifically designed for drilling into hard surfaces like clay. These drill bits have a carbide tip that is able to penetrate the clay pot effectively. Using a regular drill bit may not be as effective and can cause the pot to crack or shatter. Additionally, the use of a masonry drill bit will help to create clean and precise holes in the clay pot.