
Converting a circular saw into a table saw is a great way to save money and repurpose an old tool. While it may not be as high-quality as a professional table saw, it can be a good option for occasional use. All you need is some spare lumber, a circular saw, and a bit of time. The process involves building a table with a removable panel to mount the circular saw, creating a fence for guidance, and ensuring the blade is parallel to the fence. It's important to prioritize safety throughout the build and when using the final product.
What You'll Learn
![]()
Build a table with removable panel
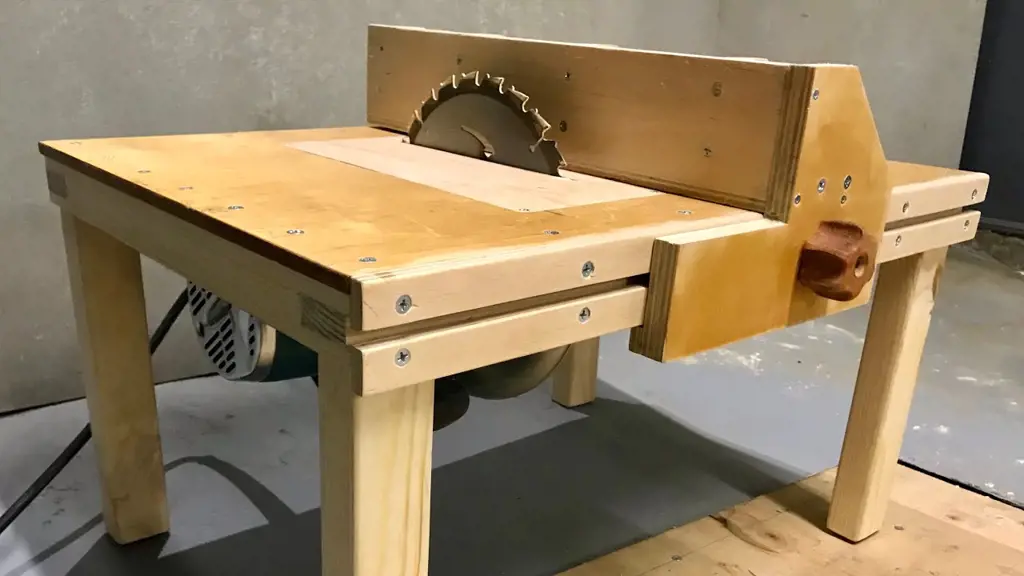
Building a table with a removable panel is a great way to convert a circular saw into a table saw. Here's a step-by-step guide to help you through the process:
Step 1: Making the Table
Begin by gathering reasonably flat lumber to create your table. You can choose to add legs to your table or simply place it on sawhorses. Ensure that you add cross pieces to enhance stability. When screwing the table together, make sure that all screws are countersunk or counter-bored to create a smooth surface.
Step 2: Creating the Removable Panel
Leave a hole in the centre of the table to accommodate the removable panel. This panel will make it easier to mount the circular saw and will provide versatility in using the table with other tools. You can use washers, small lag screws, or regular screws to install the panel, ensuring that all hardware is below the table's surface.
Step 3: Adding a True Edge for the Fence
Depending on the lumber used and the final shape of your table, you may need to add a true piece of wood to the edge where the fence will be attached. If your table already has a flat and even edge, you can skip this step.
Step 4: Constructing the Fence
The fence is a crucial component that acts as a guide during cutting. It should be adjustable yet firm enough to facilitate consistent cuts. Use a suitable type of wood, such as 1x4 lumber, and screw the pieces together at right angles to form an L-shape. Ensure that the edge of the fence is smooth by counter boring holes.
Step 5: Mounting the Circular Saw
Now, it's time to mount the circular saw onto the removable panel. Cut a large slot in the panel for the blade to protrude through the table. The exact method of mounting the saw will depend on its specific model. Typically, you can drill through the deck and use bolts and nuts to secure the saw to the panel.
Step 6: Truing the Fence to the Blade
Before using your newly crafted table saw, ensure that the fence is parallel to the blade. Adjust the position of the fence so that both ends of the blade have the same distance from it.
Remember to prioritise safety throughout the building process and when using your new table saw. Always follow proper safety procedures, including wearing eye protection, keeping your fingers away from moving blades, and avoiding loose-fitting clothing.
Understanding the Distinctive Features of Micro Lite Chainsaws
You may want to see also
![]()
Create a flat edge for the fence

Creating a flat edge for the fence is an important step in building a table saw. Here are some detailed instructions to help you achieve this:
Firstly, assess the lumber you are using and the final shape of your table. You may need to add a true piece of wood to the edge where the fence will be attached. Ensure this piece of wood is flat, straight, and of appropriate thickness. If the edges are not parallel, you can correct this later as the fence only needs to be true to the blade and not the end of the table.
Next, create a T-square part for your fence by gluing and screwing together pieces of wood. This will form a 90-degree angle, ensuring the fence is straight and adjustable. Drill holes and use screws to attach this T-square part to the bottom of the long fence.
Now, focus on the fence rail assembly. Cut out the necessary pieces of wood and drill holes for screws. Use a jig to quickly and accurately drill 5/8" holes in the exact same place on each piece. Stack the pieces with a bolt to ensure the holes line up, and then glue and screw them together. This assembly should be very straight and sturdy.
After that, attach the fence rail assembly to the T-square part. Make sure there is a gap between them, which can be adjusted later. Check that the entire fence is straight and make any necessary adjustments. You can clamp it to a workbench to ensure it dries straight.
Finally, create a locking mechanism for your fence. You can use a cam handle or a similar design. Drill holes and attach the cam handle with bolts. Test the locking action and make sure it applies enough pressure to lock the fence in place. You can use shims or a thicker rub plate if adjustments are needed.
By following these steps, you will create a flat edge for your table saw's fence, ensuring straight and accurate cuts.
Maximize Safety and Precision: Can You Add a Clamp to a Mitre Saw?
You may want to see also
![]()
Make the fence

The fence is the bit of wood that acts as a guide when cutting. It must be adjustable but firm enough to allow consistent cuts. You can use 1x4 lumber and try to cancel out errors in the wood by screwing them together at right angles so that their cross-section is L-shaped.
If your table has a rough or uneven edge, you will need to use a true and flat piece of wood, so you can make a fence that is also true and flat. Once you have your piece of wood, use some wood glue and a few screws to secure it in place in the appropriate location (to the right of the table). Make sure that the top of this piece is flush with the rest of the table. Now, you can saw a very thin slot in this piece, right into the middle, down the length of it. This way, you will be able to adjust the positioning of the fence itself.
Perhaps the hardest part is attaching the fence to the table so that it is still adjustable. Remember, not all table saw cuts are the same, so you should be able to adjust the fence. So, take your piece of wood that will be the fence and screw it to the piece of wood that you just attached to the right side of the table, and screw it to that piece at a 90-degree angle.
Seeing as the first piece of wood has a slot running down the middle, you can choose to screw the fence in at any position relative to the blade.
Exploring the Feasibility of Ripping PVC Planks on a Table Saw
You may want to see also
![]()
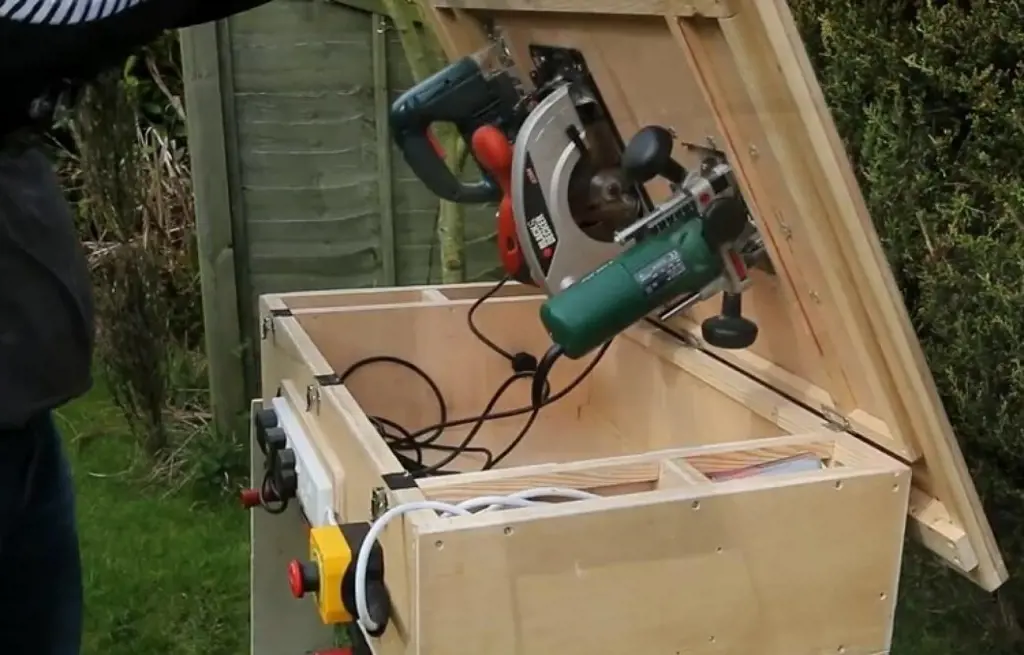
Mount the saw to the panel

Mounting the saw to the panel is a crucial step in converting a circular saw into a table saw. Here's a detailed guide on how to do it:
Firstly, cut a slot in the removable panel. This slot will be where the blade of the circular saw protrudes through the table. Ensure that the slot is not too wide, as you don't want wood pieces falling into the saw blade.
Next, figure out how to mount your circular saw to the underside of the panel. This may vary depending on the model of your circular saw. For example, the DeWalt circular saw has a fiberglass deck that can be easily drilled through. Use bolts and nuts to firmly secure the saw to the panel. Ensure that the blade of the saw is aligned with the slot in the panel.
If you're using a Makita circular saw, you might want to remove the shoe, adjustment mechanisms, and blade guard. This will give you more flexibility in designing the mount. You can then use clamps or screws to attach the saw to the panel, ensuring that the blade is parallel to the plywood.
When mounting the saw, consider the depth of the cut you want to achieve. You might need to adjust the height of the saw or the thickness of the panel to get the desired depth.
Remember to always prioritize safety when working with power tools. Ensure that all hardware is below the surface of the table to avoid any obstructions. Also, be cautious when drilling through the deck of the circular saw, as you don't want to damage any internal components.
Once you've mounted the saw to the panel, you'll have a removable panel with an upside-down circular saw attached to its underside, and the blade protruding through the top. Now, you're one step closer to having your very own table saw!
Create a Reliable Hold Down Clamp for Your Miter Saw
You may want to see also
![]()
True the fence to the blade
Squaring up the fence to the blade is an important step in ensuring your table saw makes accurate cuts. Here is a detailed, step-by-step guide:
Step 1: Prepare the Table
Before you begin, ensure your table is stable and secure. If your table has legs, confirm that they are firmly attached. If your table is resting on sawhorses, make sure it is steady and will not shift during the process.
Step 2: Adjust the Guard
Pull back the guard of your circular saw. This will give you better access to the blade for the next steps. Remember to unplug the saw before doing this to avoid any accidental activation.
Step 3: Square the Fence to the Blade
Place a single screw in the T of the fence. Now, square the fence with the end of the table. Use a square tool to ensure a perfect 90-degree angle. This step may require some trial and error, making small adjustments until you achieve a perfect square.
Step 4: Secure the Angle
Once you have achieved a square, add at least one more screw to secure the angle. This will prevent the fence from shifting out of alignment.
Step 5: Check for Accuracy
At this point, your fence should be parallel to the blade. To verify this, measure the distance between the fence and both ends of the blade. The distance should be the same at both ends. If there is a discrepancy, make the necessary adjustments to the fence until it is truly parallel to the blade.
Safety Precautions:
Working with power tools such as table saws requires caution. Always follow these safety guidelines:
- Wear safety glasses to protect your eyes from debris and sawdust.
- Avoid wearing loose clothing or gloves, as they can get caught in the blade.
- Ensure you have a firm footing before starting a cut and maintain a stable stance throughout the cutting process.
- Do not twist the workpiece or pause mid-cut, as this can be dangerous.
- Always follow the safety instructions provided by the manufacturer of your saw.
Discover the Essential Factors for Choosing the Perfect Chain Saw for Your Needs
You may want to see also


