A table saw fence is one of the most important accessories for a table saw. While the fences supplied by manufacturers are functional, they are often not reliable or of good quality. Building your own table saw fence can be achieved in less than an hour and is a simple and low-budget project.
There are many types of DIY table saw fences, each with different plans and tutorials. For example, the Biesemeyer style fence has a T-square structure and uses a fastening latch to secure the fence. Another option is to build a wooden table saw fence using half an inch of plywood. This type of fence operates on a rail with accurate measurements and includes a wooden lever to secure the fence in place.
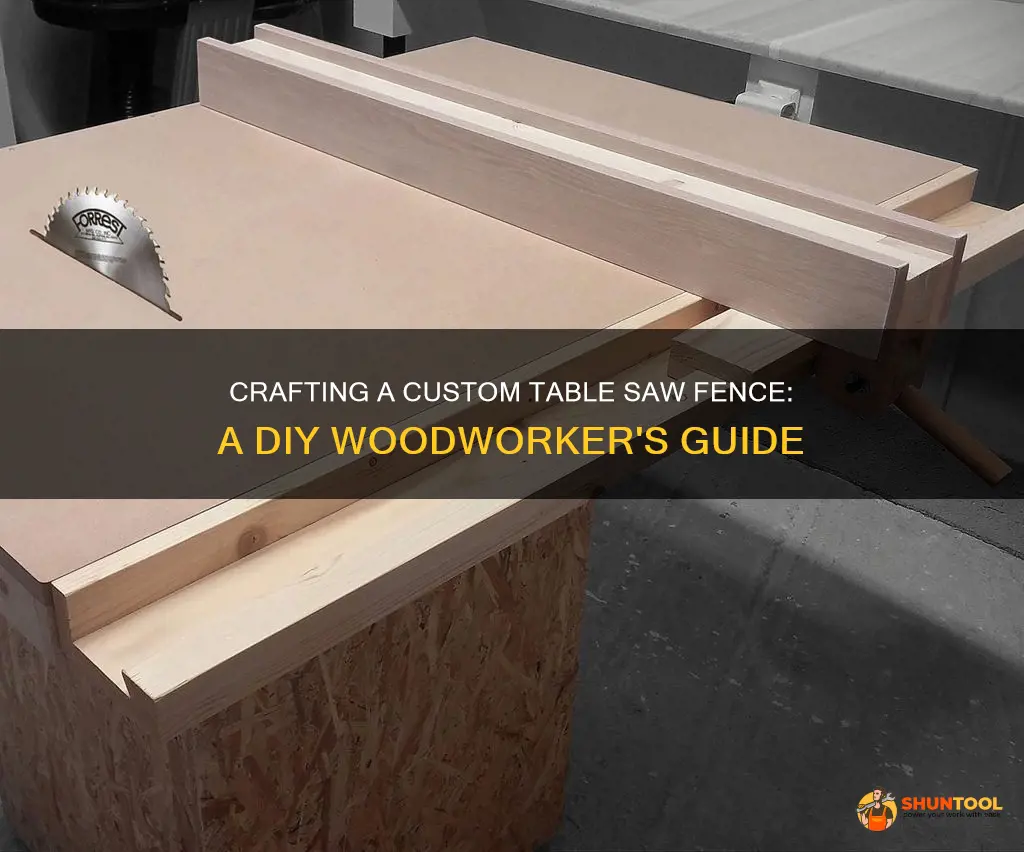
With the right guidelines and a bit of effort, you can successfully create your own custom table saw fence.
What You'll Learn
![]()
Measure your saw to determine the length of the fence
Measuring your table saw is a crucial step in determining the length of the fence for your custom table. Here are some detailed instructions to help you through this process:
First, it is important to measure your saw accurately before beginning any construction. This includes ensuring that your table is square and upright, aligning with the blade. The table's dimensions, particularly the length from front to back, will be essential for determining the required length of the fence.
Let's consider an example to illustrate this process. Suppose your table top measures 23 inches (584mm) from front to back. In this case, you would want to make the fence parts longer to match. For instance, if your saw measures 27 inches (686mm) from front to back, you should add 4 inches (102mm) to the fence parts to achieve the desired length.
It is worth noting that some plans for custom table saw fences may provide specific dimensions. In such cases, you will need to adjust your fence length accordingly to match those specifications. Additionally, if you intend to use your table saw for specific types of cuts or projects, you may need to consider the required length of the fence to accommodate those needs.
By taking these measurements and considerations into account, you can determine the appropriate length for the fence of your custom table saw. This step is crucial to ensure that your fence functions properly and securely with your table saw setup.
Choosing the Right Width Board for the DeWalt Table Saw 12: A Comprehensive Guide
You may want to see also
![]()
Cut the wood to size
The first step in making a custom table saw fence is to cut the wood to the appropriate size. The size of the wood will depend on the dimensions of your table saw, so be sure to measure carefully before cutting.
For the main fence piece, you will need a length of wood that is slightly longer than the length of your table saw. Typically, the wood should be about 1/2 inch longer than the table length. This will ensure that the fence can be securely attached to the table and provide an adequate guide for your cuts.
In addition to the main fence piece, you will also need to cut wood pieces for the supporting structure. This may include vertical and horizontal pieces that attach to the main fence, as well as any additional components such as a wooden lever or locking mechanism.
When cutting the wood, use a sharp blade and a steady hand to ensure straight and accurate cuts. A table saw or hand saw can be used for this purpose. It is important to wear appropriate safety gear, such as gloves and eye protection, when operating power tools and handling wood.
Once all the wood pieces are cut to size, you can move on to the next step of assembling the fence. However, before assembly, it is a good idea to lay out all the pieces and double-check their placement and fit. This will help ensure that your custom table saw fence comes together smoothly and securely.
Unlocking the Potential: How to Rip Fresh Pine into Saw Logs
You may want to see also
![]()
Drill holes and countersinks
Drilling the holes and countersinks is the next step in the process. This is done before assembling the fence, and it is important to ensure that the holes are drilled accurately and in the correct locations.
For parts J1, J2, K1, and K2, a 5/8" hole needs to be drilled in exactly the same place on each piece. To achieve this, set up a simple jig that can be clamped to the drill press table. This will help hold the pieces securely and ensure consistent hole placement.
It is important to note that locating the exact centre of each piece can be challenging. To address this, stack the pieces in the correct orientation so that the holes will align. Using a 5/8" bolt can assist in this process. Draw a line across the pieces to indicate the correct orientation before gluing them in place.
When drilling the holes, it is recommended to use a drill press for accuracy and to prevent the wood from splintering. Additionally, clamping the workpiece securely and using a drill bit with a sharp, centred tip will help achieve clean and precise holes.
After drilling the holes, it is important to deburr the edges to remove any splinters or rough spots. This can be done using a countersink bit or a sanding drum attached to a rotary tool.
Once the holes are drilled and deburred, the next step is to drill the countersinks. Countersinking helps the screw heads sit flush with the surface of the wood, resulting in a cleaner and more professional appearance. Choose a countersink bit that matches the size of your screw heads and drill to the appropriate depth.
It is important to note that the order of operations is crucial. Drilling the holes first and then the countersinks helps ensure accuracy and prevents the wood from splintering. Taking the time to measure and mark the drill spots accurately will contribute to a successful outcome.
How to Use a Wet Saw for Easy Tile Cutting
You may want to see also
![]()
Assemble the fence rail
The fence rail assembly is straightforward. Parts A, B, and C make up the mounting angle that will be fastened to the saw. These parts should be glued and screwed together, ensuring that the joints are strong. Use temporary plywood spacers to set the gap between the fence rail and the angle, and then screw on the fence rail without glue, as it will need to be adjusted later. Before the glue dries, check that the mounting angle is straight by clamping it down to a straight surface, such as a workbench, and letting it dry.
For the sliding mechanism, use square wood pieces and mark the groove centre. Drill three holes all the way through one piece and then use a drill bit to mark the hole places on the second piece. Drill the middle hole all the way through the second piece, and the side holes only halfway. Hammer in two T-nuts into the side holes and use a chisel to remove a few millimetres of wood to compensate for the T-nut on the back. Glue, clamp, and screw both pieces together to create a solid unit.
For the sliders, use carriage bolts. The side bolts will act as sliders, while the middle bolt will tighten the mechanism. If your carriage bolts have round bolt heads, grind two sides to make them fit in the rail.
Additional tips
- Before any assembly, cut out all the parts and drill the holes and countersinks. Then, drill the pilot holes for the screws during assembly.
- It is a good idea to measure your saw before getting started to determine the appropriate length for the fence rail.
- The majority of the parts for the fence rail assembly can be made from a single piece of 1/2" plywood.
Can a Reciprocating Saw Be Used on a Table?
You may want to see also
![]()
Test the fence for accuracy
Testing the accuracy of your table saw fence is crucial to ensure clean and safe cuts. Here are some detailed instructions on how to test the accuracy of your custom table saw fence:
Check the Blade and Fence Alignment:
Before using your custom table saw fence, ensure that the blade is parallel to the miter slots. Any misalignment between the blade and fence can affect the quality of your cuts and even pose safety hazards. You can use a dial indicator or a combination square to check the alignment.
Test Method 1:
- Use a dial indicator to mark a reference point on the blade, preferably on a reference tooth.
- Rotate the blade to bring the marked tooth to the front of the table, and zero out the dial indicator at this point.
- Now, move the dial indicator to the rear of the saw and place it on the same reference tooth.
- If the miter slot and blade are aligned correctly, the reading should be zero. Any deviation from zero indicates misalignment, and the dial indicator will show the direction and magnitude of the misalignment.
Test Method 2:
- If you don't have a dial indicator, you can use a combination square.
- Set the blade to touch a tooth in the front, and lock it in place.
- Now, check the same tooth at the rear of the blade. If the blade is aligned with the miter slot, the tooth should still be touching the combination square.
Test Method 3:
- Another method to test the accuracy is to use a small, 3" square block of wood.
- Adjust your fence so that the block just touches a tooth on the blade at the infeed side.
- Now, move the block to the outfeed side of the blade, keeping the same tooth in contact.
- If there is a gap or binding between the tooth and the block, it indicates that the blade-to-fence alignment needs adjustment.
Test Method 4:
- For this test, you will need one edge-jointed board and a straightedge, or two edge-jointed boards.
- Set your fence for a thin cut, removing minimal material.
- Reference the jointed edge of the board against your fence and rip halfway through the board.
- Then, flip the board end to end, keeping the jointed edge against the fence, and rip the other end to meet the previous cut.
- Use a straightedge on the newly cut edge. If it's convex, move the far end of your fence closer to the blade. If it's concave, move the fence away from the blade. If it's straight, your fence is parallel.
Test Method 5:
- Another method using two boards involves making four cuts to create two edge-jointed boards.
- Saw the two boards as described above, creating four cuts in total.
- Put the two boards together with the sawn sides facing each other.
- If there is a space in the middle, it indicates concavity, and you should move the fence away from the blade. If the ends rock, it is convex, and you should move the fence toward the blade.
Additional Tips:
- It is important to note that the accuracy of your fence depends on the straightness of the saw's front rail. Any imperfections in the rail will affect the parallelism of your cuts.
- Always ensure that your table saw and fence are clean and free from sawdust, wood chips, or dirt, as these can affect precision.
- It is recommended to measure twice and cut once. Double-check your fence settings before making a cut.
By following these steps and tests, you can ensure that your custom table saw fence is accurate and ready for safe and precise woodworking.
Finding the Perfect Price for a Used Table Saw: A Comprehensive Guide
You may want to see also
Frequently asked questions
While some ready-made table saw fences are good quality, they can be expensive. Making your own fence can save you money and ensure your fence is sturdy and durable.
The materials you need will depend on the type of fence you want to make. Most fences require wood, such as plywood or birch ply, and some metalwork, such as aluminium. You will also need various tools and hardware, including a drill, screws, glue, and a saw.
It can take as little as an hour to make a simple table saw fence. More complex designs may take a few days, mostly spent waiting for glue to dry.
Yes, there are many online tutorials and videos that provide step-by-step instructions and plans for building a custom table saw fence. These can be found on websites such as Instructables, I Build It, and YouTube.


