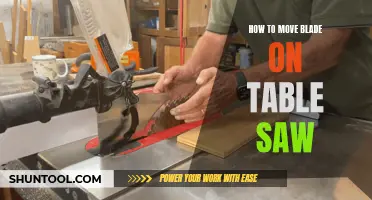
Ripping splines on a table saw is a safe and effective way to strengthen miter joints in woodworking. A spline is a strip of wood inserted into a groove in two boards with glue, adding mechanical strength and visual interest to the joint. To rip splines on a table saw, you will need to create a spline jig that fits over your table saw fence. This jig will guide your workpiece as you cut the spline slots with the table saw blade. The process involves measuring and cutting the jig pieces to fit your specific table saw, ensuring the jig is secure and square to the table, and then using the jig to cut the spline slots in your workpieces. It is important to prioritize safety when working with power tools like table saws, so be sure to follow proper safety guidelines and use personal protective equipment.
| Characteristics | Values |
|---|---|
| Purpose of a spline | Strengthen miter joints, align workpieces, add visual interest |
| Materials | Wood, glue, plywood, MDF, veneer, cardboard, screws, clamps, etc. |
| Tools | Table saw, flat-tooth saw blade, router, band saw, hand plane, etc. |
| Steps | Measure, cut, assemble, attach, glue, sand, etc. |
| Tips | Ensure straight and flat surfaces, use a splitter or riving knife for safety, wear protective gear |
What You'll Learn
![]()
How to make a table saw spline jig
Making a table saw spline jig is a simple process, but it will require some tools and materials. Here is a step-by-step guide on how to make one:
Step 1: Gather Materials and Tools
You will need some scrap plywood (flat) or MDF, a table saw, a drill, wood glue, 1 1/4" flat-head screws, a speed square, and a measuring tape.
Step 2: Cut the Fence Slider Pieces
Cut two pieces of plywood so they are slightly wider than the height of your table saw fence. The width doesn't need to be exact, but ensure both pieces have parallel edges. Place these pieces against your fence with two business cards between them. Then, put a piece of plywood flat against the fence on the opposite side. Use a square to measure the distance from the outside of the two pieces you cut to the face of the other piece of plywood. This will be the width of the top piece.
Step 3: Assemble the Fence Slider
Place a side piece on either side of the fence, with a business card shimmed between. This ensures the slider is tight but can still slide. Use two clamps to hold the side pieces in position, making sure their bottom edges are flat on the tabletop. Spread a line of super glue on the top edges of both pieces, then place the top piece and hold it in place for 30 seconds to a minute. Secure it with screws.
Step 4: Build the Face Piece
The face piece is where your box will lay. Ensure it is flat, big enough to handle your box, and has at least one straight edge. Mark a point in the middle of the straight side. Using a combo square, create two lines at a 45-degree angle from this point. You will need two pieces of scrap wood to create the support fence; these should be around 2"-3" wide. Glue and screw these pieces along the pencil lines.
Step 5: Attach the Face Piece to the Slider
Place the slider on the fence, ensuring the edges are flat on the table. Butt the face piece against the side piece closest to the blade, with the bottom edge flat on the table. Attach it with countersunk screws. Check that the face is 90 degrees to the tabletop and adjust if necessary.
Step 6: Final Adjustments
Your spline jig is now ready for use! Ensure your table saw blade is flat-toothed to avoid gaps in your spline cuts. You may also want to apply some paste wax to the inside of the fence slider to reduce friction.
Tips:
- When cutting splines, use a blade with FTG (flat top grind) teeth to ensure a flat-bottomed slot.
- Always ensure your workpiece is clamped securely and doesn't move during the cut.
- For visual interest, use a contrasting wood species for your splines.
Crafting a Custom Workbench for Your Table Saw: A Comprehensive Guide
You may want to see also
![]()
How to cut the fence slider pieces
Rip two pieces of plywood so they are slightly wider than the height of your table saw fence. The width doesn't need to be exact, but make sure they are the same and have parallel edges.
Butt both of these pieces against your fence with two business cards between them. Then put a piece of plywood flat against the fence on the opposite side.
Use a square to measure the distance from the outside of the two pieces you cut to the face of the other piece of plywood. This will be the width of the top piece, so lock the square down tight. Use it to set up the fence of your table saw for a rip cut and cut your top piece.
The length of the pieces isn't critical. Make them about 10 inches long.
Choosing the Right Size Hole Saw for a Standard Deadbolt
You may want to see also
![]()
How to cut a miter spline
A miter spline is a great way to add strength and a decorative touch to your miter joints. While miter joints are simple to make and beautiful to look at, they are not very strong. The 45-degree edges expose a lot of end grain, which can become a weak point when relying solely on glue.
Step 1: Prepare Your Workpiece
Before cutting the miter spline, you need to prepare your workpiece by crosscutting each miter using a premium 40- or 50-tooth combination blade or an 80-tooth blade for the best results. Make a test cut in dressed scrap wood and check the angle with an accurate miter square or a try square held against two adjacent miters. Ensure your workpiece is flat and straight to avoid any kickback during the cutting process.
Step 2: Set Up Your Table Saw
Install a blade with flat-top grind (FTG) teeth in your table saw. FTG teeth will leave a flat bottom in your cut, allowing the spline to sit flush. Adjust the blade height so that it extends about halfway into the mitered corner. Tilt the blade to create angled splines for a unique design element. If you're using a standard blade, consider switching to a flat-tooth blade to achieve cleaner corners and a flat bottom.
Step 3: Create a Spline Jig
Build a simple spline jig to hold your workpiece securely during cutting. You can make the jig using scrap plywood. The jig should have a three-sided box that fits snugly around your table saw fence, allowing it to slide back and forth. The face piece of the jig will hold your workpiece at a 45-degree angle. Follow online tutorials to build a spline jig that suits your table saw model.
Step 4: Layout Your Splines
Decide on the number and placement of your splines. You can opt for two splines evenly spaced from the top and bottom of your workpiece or create more intricate designs by adjusting the fence between cuts. Mark the spline locations on your workpiece before placing it in the jig.
Step 5: Cut the Spline Recesses
Place your workpiece on the face of the jig, ensuring it is supported by the 45-degree fences. Apply pressure sideways into the jig's face and down into the fences as you push the workpiece through the blade. Make the cuts for all four corners, adjusting the fence as needed.
Step 6: Prepare the Spline Material
Rip spline stock from the edge of a board of contrasting wood, ensuring the thickness matches the kerf of your blade (usually 1/8"). Cut individual splines from the strips, making them slightly longer than the slots. The grain direction of the spline material is crucial; the long-grain edge should be at the bottom of the cut to add strength to the joint.
Step 7: Glue the Splines
Apply wood glue to the splines and slide them into the recesses. Let the glue dry for about half an hour. Clean up any glue squeeze-out with a damp rag.
Step 8: Flush Cut and Sand the Splines
Once the glue is dry, trim the splines flush using a flush-trim saw or a chisel. Sand the surfaces smooth and add your desired finish.
With these steps, you can create strong and aesthetically pleasing miter splines using a table saw. Remember to prioritize safety and always wear protective gear when operating power tools.
Understanding the Right Blade for Your Demolition Saw
You may want to see also
![]()
How to lay out your splines
How you lay out your splines is entirely up to you. The easiest method is to cut two splines at the same distance from the top and bottom of a box. With the jig, you don't need to measure. Simply adjust your fence so that the table saw blade cuts one spline. Then, flip the box around without changing anything and make a second cut. Your two splines will now be evenly spaced.
If you want to create more than two evenly spaced splines, you can use the following trick. First, measure the distance from the box's bottom to the top edge. Then, divide that distance by one more than the number of splines you want. For example, if your box edge is 5" wide and you want four equally spaced splines, divide 5" by 5 (4+1) to get 1". Measure 1" in from each side to mark the two outer splines, then 1" in from that point for your inner splines.
Once you've decided on your layout, set your fence so that the box will pass over the blade at the right point when sitting in the jig.
If you're cutting the slots with a table saw, use a rip blade. The teeth of a rip blade leave a square end on the slot. You'll need to make a jig to run over the blade and use the rip fence as a guide. There are plenty of references available online.
If you're cutting the slots with a router, you can use a 1/4" tongue and groove cutter. Run the groove cutter in your router, centering it on the thickness as closely as possible. Then, make two passes, flipping the stock for the second one. This will make the slot slightly bigger than 1/4", allowing the spline to fit easily.
Cutting the splines
Rip spline stock from the edge of a board of contrasting stock. Match its thickness to the kerf of your blade—usually 1⁄8". Then, cut individual splines from the strips, making them slightly longer than the slots.
What You Need to Know About Zero Clearance Table Saw Inserts
You may want to see also
![]()
How to cut the spline recesses
Now that your jig is built and your splines are ready, it's time to cut the spline recesses in your workpiece. Here's a step-by-step guide:
- Lay Out Your Splines: The layout of your splines depends on your preferences and the design of your project. For a simple approach, create two splines evenly spaced from the top and bottom of a box. No need for measurements here; just set your fence so that the table saw blade cuts one spline. Then, flip the box around without adjusting anything and make a second cut. Your splines will now be evenly spaced. If you want more than two equally spaced splines, you can use a simple calculation trick. Divide the distance from the box's bottom to the top edge by one more than the number of splines you want. This will give you the spacing between each spline. Once you've decided on the layout, adjust your fence accordingly.
- Set Your Cutting Depth: Determine how far you want your spline to extend across both sides of the workpiece by adjusting the blade height. Ensure that your cutting depth is not so high that you cut all the way through the corner. The type of table saw blade you use will also make a difference. Ideally, use a blade with at least one FTG (flat top grind) tooth, as this will leave a flat bottom to your cut, allowing the spline to sit snugly.
- Prepare Your Workpiece: Place your workpiece, such as a box, on the face of the jig so that it is supported by the two 45° fences. This will ensure that the workpiece is securely positioned during the cutting process.
- Cut the Spline Recesses: With your workpiece securely in place, it's time to make the cuts. Turn on your table saw and carefully push the workpiece through the blade. Maintain pressure on the workpiece in two directions: sideways into the jig's face and down into the 45° fences. If you are creating two evenly spaced splines, flip the workpiece around without adjusting the fence and make a second cut. Repeat this process for all four corners if necessary. If you are experiencing tear-out where the blade exits the cut, try using blue painter's tape. Apply a strip of tape on the back edge where the blade will exit before making subsequent cuts to help keep the fibres in place and prevent splintering.
Dewalt Circular Saws: Maximizing Performance with the Dewalt DCB207 Battery
You may want to see also
Frequently asked questions
What is a spline?
What are the benefits of adding a spline to a joint?
What type of blade should I use when cutting splines on a table saw?
How do I prevent tearout when cutting splines on a table saw?