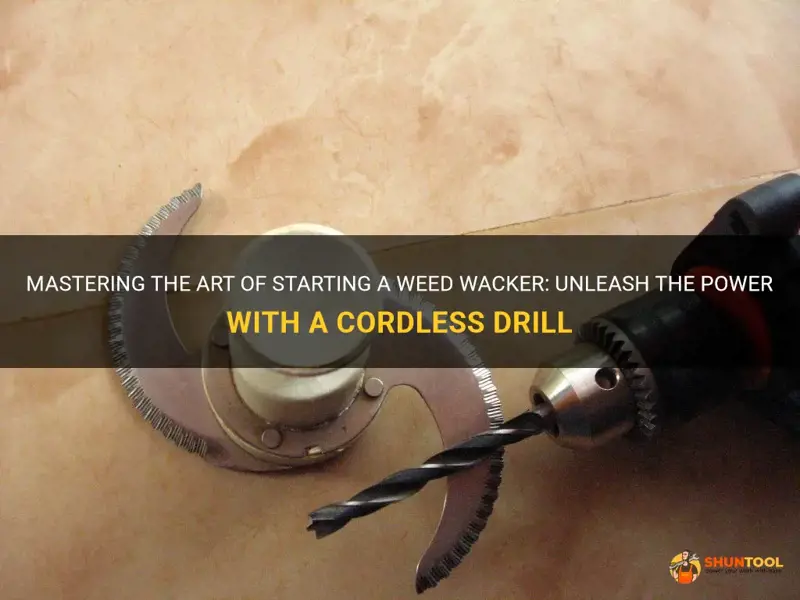
Are you tired of the hassle and frustration of trying to start your weed wacker with a pull cord? Look no further, because today, we're going to guide you through a game-changing technique that allows you to start your weed wacker effortlessly using a cordless drill! Whether you're a homeowner with a small garden or a professional landscaper, this innovative approach will save you time, energy, and the frustration of dealing with a stubborn starting mechanism. So grab your cordless drill and get ready to revolutionize the way you start your weed wacker!
| Characteristic | Value |
|---|---|
| Power source | Cordless drill |
| Fuel type | Not applicable |
| Starting mechanism | Cordless drill |
| Compatibility | Some weed wacker models can be started with a cordless drill |
| Ease of use | Requires basic knowledge of weed wacker and cordless drill operation |
| Portability | Can be used anywhere with a cordless drill |
| Convenience | Allows for quick and easy starting of the weed wacker |
| Cost savings | No need for purchasing a separate starting device |
| Battery requirements | Requires a charged battery for the cordless drill |
| Maintenance requirements | Regular maintenance of the cordless drill and weed wacker |
| Safety precautions | Ensure both the drill and weed wacker are used safely |
| Potential risk of damage to tools | User must be cautious to avoid damaging the drill or weed wacker |
What You'll Learn
- What type of cordless drill is best suited for starting a weed wacker?
- Are there any special attachments or modifications needed to connect a cordless drill to a weed wacker?
- Are there any safety precautions or guidelines to consider when using a cordless drill to start a weed wacker?
- What are the steps involved in using a cordless drill to start a weed wacker properly?
- Are there any limitations or potential issues to be aware of when using a cordless drill to start a weed wacker?
![]()
What type of cordless drill is best suited for starting a weed wacker?
When it comes to starting a weed wacker, using a cordless drill can be a convenient and efficient method. However, not all cordless drills are suitable for this task. There are specific features to look for when choosing the best cordless drill for starting a weed wacker.
One important factor to consider is the power of the drill. Starting a weed wacker requires a considerable amount of torque, so it is crucial to select a cordless drill with a high torque rating. A torque rating of at least 400 inch-pounds or higher is recommended for this task. This will ensure that the drill is capable of providing enough power to start the weed wacker effectively.
Additionally, the speed settings of the cordless drill are also important. It is recommended to choose a drill with variable speed settings, as this will allow for greater control and precision when starting the weed wacker. Low-speed settings are generally preferred for this task, as they provide more torque and are better suited for starting engines.
Furthermore, the battery life and capacity of the cordless drill are essential considerations. Starting a weed wacker can be a demanding task, requiring sustained power for an extended period. Therefore, it is advisable to choose a cordless drill with a high-capacity battery that can last for an extended period. Lithium-ion batteries are generally preferred due to their longer runtime and quick recharge times.
In terms of the battery voltage, a cordless drill with a voltage rating of 18V or higher is recommended for starting a weed wacker. Higher voltage drills generally provide more power and torque, making them better suited for this task.
It is also important to consider the size and weight of the cordless drill. The drill should be compact and lightweight, allowing for comfortable handling and maneuverability. Starting a weed wacker can require holding the drill in various positions, so a lightweight and ergonomic design will make the task easier.
To start a weed wacker using a cordless drill, follow these steps:
- Ensure the weed wacker is in a safe and stable position.
- Attach the chuck of the cordless drill to the weed wacker's starting mechanism.
- Hold the drill firmly with both hands and engage the drill's low-speed setting.
- Squeeze the drill's trigger to start the rotation.
- Apply steady pressure to the starting mechanism of the weed wacker until the engine starts.
- Release the trigger and carefully remove the cordless drill from the weed wacker.
It is important to note that using a cordless drill to start a weed wacker may void the warranty of the weed wacker. Therefore, it is advisable to check the manufacturer's guidelines and warranty information before attempting this method.
In conclusion, when selecting a cordless drill for starting a weed wacker, it is crucial to consider factors such as power, speed settings, battery life and capacity, battery voltage, and size and weight. By choosing a drill with the right specifications and following the proper steps, starting a weed wacker with a cordless drill can be a convenient and effective method.
Does My Cordless Rotary Hammer Drill Need Greased? Find Out Here!
You may want to see also
![]()
Are there any special attachments or modifications needed to connect a cordless drill to a weed wacker?
When it comes to connecting a cordless drill to a weed wacker, there are a few things to consider. While it is possible to create a makeshift connection, it is not recommended as it may lead to safety concerns and potential damage to the equipment. Instead, it is better to use a specialized attachment or modification specifically designed for this purpose.
One popular attachment that can be used to connect a cordless drill to a weed wacker is a drill bit adapter. This adapter allows you to attach the drill bit of the drill to the weed wacker, essentially turning it into a powered weed wacker. The drill bit adapter is typically made from durable materials such as steel or aluminum, ensuring that it can withstand the rigors of cutting through tough vegetation.
To use a drill bit adapter, you will first need to remove the trimmer head or line from the weed wacker. This can usually be done by removing a small screw or bolt that holds it in place. Once the trimmer head is removed, you can then attach the drill bit adapter to the weed wacker. Make sure to securely tighten any screws or bolts to ensure a stable connection.
Once the drill bit adapter is attached, you can then insert the drill bit into the adapter. It is important to choose a drill bit that is suitable for cutting through vegetation. For example, a drill bit with a sawtooth or serrated edge is often recommended for cutting through thick weeds or brush. Make sure to securely tighten the drill bit in the adapter to avoid any accidents or damage.
After everything is securely attached, you can then power on the drill and start using it as a weed wacker. Keep in mind that the speed and power of the drill will determine the cutting performance. It is recommended to start at a lower speed and gradually increase it as needed. Always be cautious and wear appropriate safety gear, such as goggles and gloves, when operating the drill as a weed wacker.
While using a drill as a weed wacker can be a convenient option, it is important to note that it may not provide the same level of performance as a dedicated weed wacker. The drill may not have the same cutting power and maneuverability, especially when dealing with larger or tougher vegetation. Therefore, it is recommended to use a drill as a weed wacker for lighter tasks or small areas.
In conclusion, connecting a cordless drill to a weed wacker requires a specialized attachment or modification. The drill bit adapter is a popular option that allows you to attach a drill bit to the weed wacker, effectively turning it into a powered weed wacker. It is important to choose a suitable drill bit and securely tighten all attachments to ensure safety and optimal performance. When using a drill as a weed wacker, it is recommended to start at a lower speed and use caution.
Discover the Pricing Range of Black and Decker Cordless Drills
You may want to see also
![]()
Are there any safety precautions or guidelines to consider when using a cordless drill to start a weed wacker?
Starting a weed wacker with a cordless drill can be a convenient and time-saving method. However, it is important to take certain safety precautions and follow guidelines to ensure a smooth and safe operation. Here are some tips to consider:
- Consider the power source: Make sure the cordless drill is fully charged and in good condition. Ensure that the battery is properly inserted into the drill and securely connected.
- Use the correct drill bit: Use an appropriate drill bit that fits securely into the chuck of the cordless drill. The size and shape of the drill bit should match the starting mechanism on the weed wacker.
- Familiarize yourself with the weed wacker: Before using the cordless drill, familiarize yourself with the starting mechanism of your specific weed wacker. This will help you determine the appropriate drill bit size and know where to engage the drill.
- Position yourself correctly: Stand in a stable position with your feet shoulder-width apart. Ensure that you have a solid grip on both the cordless drill and the weed wacker. Keep your body weight evenly distributed and avoid leaning over the equipment while starting it.
- Engage the cordless drill: Attach the drill bit securely into the chuck of the cordless drill and tighten it according to the manufacturer's instructions. Hold the cordless drill firmly, making sure you have a good grip on both the drill and the weed wacker.
- Start the weed wacker: Locate the starting mechanism on the weed wacker. This can vary depending on the model and manufacturer. Insert the drill bit into the starting mechanism and engage the drill slowly. Apply consistent pressure and let the drill rotate the starting mechanism.
- Be prepared for kickback: As the weed wacker starts, be prepared for kickback. Kickback occurs when the starting mechanism engages and the engine begins to rotate. Maintain a firm grip on the equipment and be ready to react quickly if there is any sudden movement.
- Disconnect the drill: As soon as the weed wacker starts, disconnect the cordless drill immediately. Do not continue to run the drill while the weed wacker is in operation. Remove the drill bit from the starting mechanism and switch the weed wacker to its normal operating mode.
It is important to note that using a cordless drill to start a weed wacker may void the warranty of the weed wacker. Make sure to check the manufacturer's guidelines and consult the user manual before attempting this method. Additionally, always wear appropriate safety gear such as gloves, safety goggles, and ear protection when operating any power equipment.
In conclusion, starting a weed wacker with a cordless drill can be an efficient method, but it requires caution and adherence to safety guidelines. By following the steps outlined above and being prepared for kickback, you can safely and effectively start your weed wacker using a cordless drill.
Finding the Right Rhinestone Size for Your Diamond Painting Drills
You may want to see also
![]()
What are the steps involved in using a cordless drill to start a weed wacker properly?
Using a cordless drill to start a weed wacker properly can save you time and frustration. While it may seem like a complicated process, it is actually quite simple if you follow a few basic steps. In this article, we will guide you through the step-by-step process to help you get your weed wacker up and running quickly.
Step 1: Prepare your equipment
Before you begin, make sure you have all the necessary tools and equipment. This includes a cordless drill, a fully charged battery for the drill, and a compatible drill bit that fits into the weed wacker's starter pulley.
Step 2: Align the drill bit
Insert the drill bit into the chuck of the cordless drill and tighten it securely. Take care to align the drill bit properly so it can engage with the starter pulley.
Step 3: Remove the spark plug
Locate the spark plug on the weed wacker and use a spark plug socket wrench to remove it. This will allow you to manually turn the engine over using the cordless drill and starter pulley.
Step 4: Engage the drill bit
Hold the weed wacker securely and align the drill bit with the starter pulley. Apply firm but gentle pressure to engage the drill bit with the pulley. Make sure the drill is set in the reverse direction so it can rotate counterclockwise, mimicking the normal rotation of the engine's crankshaft.
Step 5: Turn the engine over
Once the drill bit is engaged with the starter pulley, slowly squeeze the trigger on the cordless drill to start turning the engine over. Use short bursts of power and avoid continuous rotation to prevent damage to the engine or starter mechanism.
Step 6: Replace the spark plug
After a few rotations of the engine, carefully remove the drill bit from the starter pulley and reinstall the spark plug. Make sure to tighten it securely but not overly tight.
Step 7: Prime and start the weed wacker
Now that the engine is primed and ready to go, follow the manufacturer's instructions to prime the weed wacker and start it using the pull cord or electronic start button, depending on the model.
By following these steps, you can easily start your weed wacker using a cordless drill. Remember to always refer to the manufacturer's instructions for your specific model to ensure proper use and prevent any potential damage. Using a cordless drill as a starting method can be a convenient option, especially if you have difficulty with traditional pull cords or recoil starters. However, it's important to note that this method should only be used as a last resort or in emergency situations, as it may void the warranty or damage the starter mechanism if not done correctly.
Signs of a Failing Nakita Cordless Drill Battery Charger
You may want to see also
![]()
Are there any limitations or potential issues to be aware of when using a cordless drill to start a weed wacker?
When it comes to starting a weed wacker, there are several methods you can use. One popular option is to use a cordless drill to help start the engine. This can be a convenient and efficient way to get your weed wacker up and running, especially if you already have a cordless drill handy. However, there are some limitations and potential issues to be aware of when using this method.
Firstly, not all weed wacker models are compatible with this starting method. Some models may have specific requirements or safety features that prevent them from being started with a cordless drill. It's important to consult your weed wacker's user manual or contact the manufacturer to determine if this method is safe and recommended for your specific model.
Secondly, even if your weed wacker is compatible with a cordless drill, there may still be limitations in terms of the size and power of the drill you can use. Most cordless drills have varying torque and speed settings, and it's important to use a drill that is capable of delivering enough power to start the engine. If your drill is underpowered, it may struggle to turn over the engine, resulting in a difficult or failed start.
To use a cordless drill to start your weed wacker, follow these steps:
- Make sure the weed wacker is on a stable surface and the cutting head is clear of any obstructions.
- Locate the starter mechanism on the weed wacker. This is typically a cord or pull handle that you would normally pull to manually start the engine.
- Attach the chuck of the cordless drill to the starter mechanism. Make sure it is securely attached and will not come loose during operation.
- Set the drill to the lowest torque or speed setting. This will help prevent damage to the weed wacker's engine.
- Pull the trigger of the cordless drill to start the engine. The drill will turn the starter mechanism, mimicking the motion of pulling the cord or handle.
- Once the engine starts, release the trigger on the cordless drill and detach it from the starter mechanism.
- Allow the weed wacker to warm up for a few minutes before using it for trimming or cutting.
It's important to note that using a cordless drill to start a weed wacker should only be done as a temporary solution. If your weed wacker consistently requires a drill to start, it may be a sign of a larger issue, such as a faulty spark plug or carburetor. It's best to have your weed wacker inspected and repaired by a professional if this is the case.
In conclusion, using a cordless drill to start a weed wacker can be a convenient and efficient method, but it's important to be aware of the limitations and potential issues. Not all weed wacker models are compatible with this starting method, and the size and power of the drill can also be a limiting factor. Follow the steps outlined above to safely use a cordless drill to start your weed wacker, but remember to have any underlying issues with your weed wacker addressed by a professional.
The Salary of Drill Instructors: Revealing How Much They Make
You may want to see also
Frequently asked questions
To start a weed wacker with a cordless drill, you will need to first remove the starter cord assembly from the weed wacker. Then, locate the hole where the starter cord was housed and insert the shaft of the cordless drill into this hole. Hold the drill firmly and press the trigger to start the drill, which in turn will rotate the shaft and crank the engine of the weed wacker. This method is a convenient and efficient way to start a weed wacker, especially if you have difficulty pulling the starter cord.
Yes, starting a weed wacker with a cordless drill is generally safe if done correctly. However, it is important to take proper precautions to ensure your safety. Make sure to wear suitable protective gear, such as safety goggles and gloves, to protect yourself from any debris or moving parts. Additionally, always ensure that the drill is secure and properly inserted into the weed wacker before starting it. Following these safety guidelines will minimize the risk of accidents or injuries during the start-up process.
While it is possible to use any cordless drill to start a weed wacker, it is recommended to use a drill with a higher torque rating for better performance. Higher torque drills are able to rotate the shaft of the weed wacker more effectively, providing a smoother and quicker start. Additionally, using a drill with a higher voltage will also provide more power, resulting in a faster starting process. However, if a higher torque or voltage drill is not available, you can still use any cordless drill to start your weed wacker, though it may require a bit more effort and time.