When it comes to turning a bowl, one of the most important considerations is the size of the drill bit you are using. The size of the drill bit can greatly impact the shape and size of the bowl, as well as its overall balance and stability. Choosing the right size drill bit can make all the difference in creating a beautiful, functional bowl that will be a centerpiece in any room. So, let's dive deeper into the world of drill bit sizes and how they can enhance your bowl turning experience.
What You'll Learn
- What size drill bit is recommended for drilling the center hole of a bowl blank?
- Are there specific size drill bits for different bowl sizes or can I use the same drill bit for all sizes?
- What factors should I consider when choosing the size of a drill bit for turning a bowl?
- Are there any guidelines or standards for drill bit sizes when turning bowls?
- Does the type of wood or material being used for the bowl affect the size of the drill bit to be used?
![]()
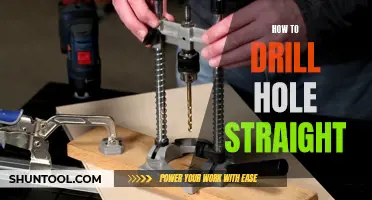
What size drill bit is recommended for drilling the center hole of a bowl blank?
When it comes to woodworking, drilling holes is a common practice for a variety of projects. One specific task that often arises is drilling the center hole of a bowl blank. This hole serves as the starting point for creating a bowl shape and is essential for accurate and efficient turning. Choosing the right drill bit size for this hole is crucial, as it affects the stability and quality of the final product.
The recommended drill bit size for drilling the center hole of a bowl blank depends on the size and thickness of the blank itself. A general rule of thumb is to use a drill bit that is slightly larger than the depth of the hole you want to create. This ensures that there is enough material left to turn down into the desired bowl shape.
To determine the appropriate drill bit size, measure the thickness of the bowl blank at its intended center. For example, if the blank is 4 inches thick, a drill bit that is slightly larger, such as 5/8 inch or 3/4 inch, would be suitable. It's important to note that the drill bit should not be too large, as it can weaken the blank and lead to instability or breakage during the turning process.
Using a smaller drill bit than necessary may result in a weak center point and difficulty when mounting the blank on the lathe. On the other hand, using a larger drill bit may remove too much material and limit the size of the final bowl. It's always better to err on the side of caution and start with a slightly larger drill bit, as you can remove additional material during the turning process if needed.
When drilling the center hole of a bowl blank, it's essential to follow proper safety guidelines. Ensure that the blank is securely clamped to a stable work surface to prevent any movement during drilling. Always wear appropriate safety gear, such as safety goggles and ear protection, to protect yourself from flying debris and loud noises.
To drill the center hole, start by marking the desired center point on the blank. Use a center-finding tool or measure and mark the midpoint accurately. Place the drill bit in the chuck of a drill press or handheld drill, ensuring that it is securely tightened. Position the drill bit above the marked center point of the bowl blank.
Slowly lower the drill bit onto the blank while applying gentle pressure. Start the drill at a low speed to prevent any unnecessary damage or tear-out. As the drill bit touches the blank, gradually increase the speed until you reach the desired drilling rate. Remember to keep the drill bit perpendicular to the surface to ensure a straight and accurate hole.
Once the hole is drilled, the bowl blank is ready to be mounted on the lathe. Choose an appropriate chuck or faceplate to secure the blank and begin the turning process. By starting with a properly drilled center hole, you can create a well-balanced and symmetrical bowl with ease.
In conclusion, choosing the right drill bit size for drilling the center hole of a bowl blank is crucial for successful turning. The size should be slightly larger than the depth of the hole required, while avoiding excessive removal of material. By following proper safety guidelines and using the correct drilling technique, you can achieve accurate and stable results in your bowl turning projects.
Understanding the Basics of an Air Hammer Drill
You may want to see also
![]()
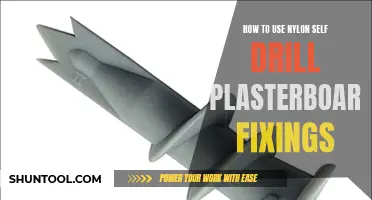
Are there specific size drill bits for different bowl sizes or can I use the same drill bit for all sizes?
Drilling holes in bowls for various purposes, such as creating drainage or hanging mechanisms, is a common task for DIY enthusiasts and professionals alike. However, when it comes to selecting the right drill bit for different bowl sizes, it is essential to consider a few factors to ensure a successful outcome. In this article, we will explore whether there are specific size drill bits for different bowl sizes or if a single drill bit can be used for all sizes.
Scientifically speaking, the size of the drill bit required for drilling holes in bowls is primarily determined by the diameter of the hole needed. Most commonly, bowl holes range in diameter from 0.5 inches to 2 inches, depending on the purpose. To accommodate various hole sizes, specialized drill bits known as hole saws are commonly used. Hole saws consist of a cylindrical drill bit with teeth on the open end, which are designed to cut through different materials.
When selecting a hole saw drill bit for drilling holes in bowls, it is crucial to choose one that matches the desired hole diameter. Hole saws come in a variety of sizes, ranging from as small as 0.25 inches to as large as 8 inches or more. As such, you will need different size hole saws for different bowl hole sizes.
To determine the correct size hole saw for your specific bowl hole, measure the diameter of the hole needed and choose a hole saw with a diameter slightly larger than the desired hole size. This will allow for a clean and precise cut without damaging the bowl material or risking the hole being too small for its intended purpose.
Additionally, it is important to consider the material of the bowl when selecting a drill bit. For example, if you are working with a ceramic or porcelain bowl, you will need a diamond-tipped hole saw specifically designed for these hard materials. On the other hand, if you are drilling through a plastic or wooden bowl, a standard hole saw with teeth designed for softer materials will suffice.
Now let's walk through a step-by-step example of drilling a hole in a bowl using the appropriate drill bit:
- Ensure you have measured the desired hole diameter accurately.
- Select the correct hole saw size based on the measurement taken, choosing one slightly larger than the desired hole size.
- Attach the hole saw to your drill, making sure it is securely fastened.
- Mark the center of the hole on the bowl's surface using a pencil or marker.
- Secure the bowl in place to prevent it from moving during the drilling process, using clamps or a vice if necessary.
- Position the hole saw's pilot bit in the center mark on the bowl's surface.
- Start the drill at a low speed and apply gentle pressure as you begin drilling through the bowl material.
- Gradually increase the drill's speed until the hole saw cuts smoothly through the bowl material.
- Periodically stop and remove any debris that may have accumulated around the hole saw teeth to ensure a clean cut.
- Once the desired hole depth is reached, carefully remove the hole saw from the bowl material.
- Clean any remaining debris from the drilled hole, taking care not to damage the bowl's surface.
By following the appropriate steps and using the correct drill bit size, you can effectively drill holes in bowls of various sizes without compromising the integrity of the material or the intended purpose of the hole. Remember to exercise caution, wear appropriate safety gear, and consult the manufacturer's guidelines for both the bowl material and the drill bit to ensure a successful drilling experience.
Cutting Screws with a Drill: A Step-by-Step Guide
You may want to see also
![]()
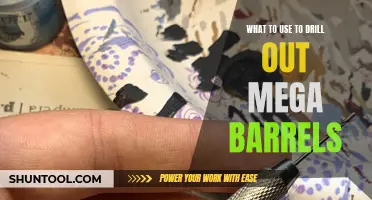
What factors should I consider when choosing the size of a drill bit for turning a bowl?
When turning a bowl on a lathe, the size of the drill bit used can greatly impact the outcome of the finished product. There are several factors to consider when choosing the appropriate size drill bit for turning a bowl, including the size of the bowl blank, the desired shape and depth of the bowl, and the type of wood being used.
- Size of the bowl blank: The size of the bowl blank will determine the size of drill bit needed. If you are turning a small bowl, a smaller drill bit will be sufficient, whereas a larger bowl will require a larger drill bit. Measure the diameter and depth of the bowl blank to determine the appropriate drill bit size.
- Desired shape and depth of the bowl: The shape and depth of the bowl will also influence the choice of drill bit size. If you want a shallow bowl, a smaller drill bit can be used. However, if you desire a deeper bowl, a larger drill bit will be necessary to remove more material. Consider the intended use of the bowl and the aesthetic you want to achieve when determining the shape and depth.
- Type of wood: The type of wood being used can affect the choice of drill bit size. Different types of wood have varying densities and hardness, which can impact the drilling process. Hardwoods, such as oak or maple, may require a larger drill bit to effectively remove material, while softer woods, such as pine or cedar, can be drilled with a smaller bit. Consider the hardness and density of the wood to choose the appropriate drill bit size.
- Step-by-step process: Once you have determined the appropriate drill bit size, follow these steps to drill the hole for turning the bowl:
- Mark the center of the bowl blank on both ends.
- Use a center punch to create a small indentation at the center mark on one end of the blank. This will act as a guide for the drill bit.
- Secure the bowl blank onto the lathe using a chuck or faceplate.
- Select the appropriate drill bit size and insert it into the drill chuck.
- Align the drill bit with the center mark on the bowl blank and slowly start drilling into the wood.
- Apply even pressure and use a slow speed to prevent overheating or burning of the wood.
- Drill the hole to the desired depth, making sure to periodically remove the drill bit to clear any wood chips or sawdust.
- Once the hole is drilled, remove the bowl blank from the lathe and proceed with the turning process.
Example: For a small bowl blank measuring 6 inches in diameter and 3 inches in depth, a 1-inch drill bit may be appropriate. However, for a larger bowl measuring 12 inches in diameter and 6 inches in depth, a 2-inch drill bit may be necessary. Additionally, if working with a dense hardwood such as maple, a larger drill bit may be needed to effectively remove material.
In conclusion, when choosing the size of a drill bit for turning a bowl, consider the size of the bowl blank, the desired shape and depth of the bowl, and the type of wood being used. Carefully follow the step-by-step process outlined above to ensure accurate and successful drilling for your bowl turning project.
The Ultimate Guide to Drilling a Screw into a Metal Pipe
You may want to see also
![]()
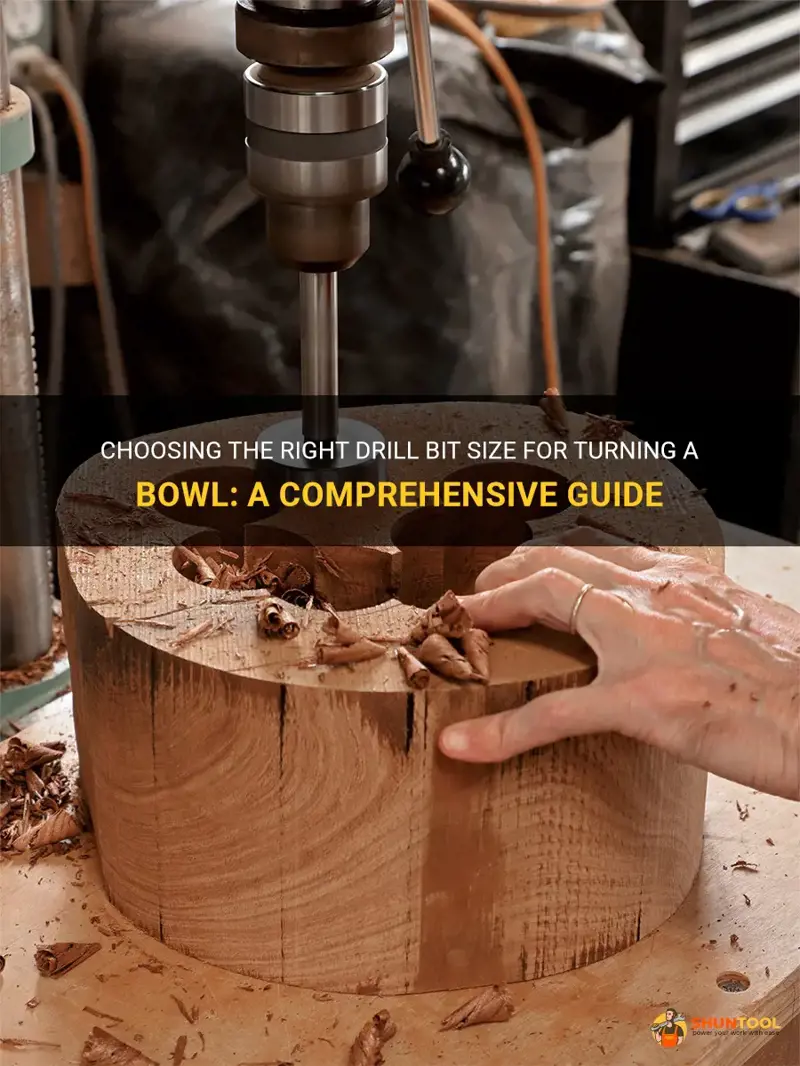
Are there any guidelines or standards for drill bit sizes when turning bowls?
When it comes to turning bowls, one of the most critical aspects is selecting the appropriate drill bit size. The drill bit size will determine the depth and diameter of the hole for mounting the bowl blank on the lathe. While there are no strict guidelines or standards for drill bit sizes when turning bowls, there are a few factors to consider. In this article, we will discuss these factors and provide some recommendations to help you make an informed decision.
- Bowl Size: The size of the bowl you plan to turn will play a crucial role in determining the drill bit size. For smaller bowls, a smaller drill bit is usually sufficient, while larger bowls may require a larger drill bit. As a general rule of thumb, aim for a drill bit that is about 1/3 the diameter of the bowl.
- Bowl Thickness: The thickness of the bowl blank will also influence the drill bit size. Thicker bowls require a larger diameter hole to ensure stability during turning. If the bowl blank is too thin, it may vibrate or bend during the turning process. Consider the thickness of the bowl blank and select a drill bit that provides enough material for stability.
- Wood Type: Different wood species have varying densities, which can affect the strength and stability of the bowl blank. Harder woods, such as oak or maple, may require a larger drill bit size compared to softer woods like pine or cedar. It is essential to consider the wood species and adjust the drill bit size accordingly to ensure a secure hold.
- Bowl Design: The design of the bowl, particularly the bottom shape, will also impact the drill bit size. If you plan to create a deeper, more concave bowl shape, a larger drill bit may be necessary to accommodate the increased depth. On the other hand, shallow bowls or plates may require a smaller drill bit to provide adequate support.
- Experience and Preference: Lastly, your experience level and personal preference come into play when selecting drill bit sizes. More experienced turners may have developed their own preferences based on their past projects and the results they achieved. If you are just starting, it may be helpful to consult with experienced turners or refer to online forums for guidance on drill bit sizes.
In summary, while there are no strict guidelines or standards for drill bit sizes when turning bowls, several factors can influence your decision. Consider the size and thickness of the bowl, the type of wood being used, the desired bowl design, and your own experience and preference. By taking these factors into account, you will be able to select an appropriate drill bit size for your bowl turning project.
How to effectively drill through stripped brass screws
You may want to see also
![]()
Does the type of wood or material being used for the bowl affect the size of the drill bit to be used?
When it comes to drilling holes into wood or other materials for a bowl, the type of wood or material being used can indeed affect the size of the drill bit needed. The size of the drill bit determines the size of the hole, which in turn determines the size of the bowl that can be created. In this article, we will explore how the choice of wood or material influences the size of the drill bit to be used, taking into account both scientific principles and practical experience.
Scientific Principles:
Different types of wood have different hardness levels and densities. Harder and denser woods, such as oak or walnut, require larger and stronger drill bits to penetrate smoothly and effectively. Softer woods, like pine or cedar, can be drilled with smaller and less powerful drill bits. This is because harder woods offer more resistance to the drilling process, requiring more force and a larger bit to effectively cut through the material.
Similarly, the choice of material other than wood can also influence the size of the drill bit. For example, drilling into metal or plastic requires a different approach and different drill bits compared to drilling into wood. Metal drill bits are typically made of high-speed steel or cobalt, which allows them to withstand the heat generated during the drilling process.
Experience and Practical Considerations:
In addition to the scientific principles, experience and practical considerations also play a significant role in determining the size of the drill bit for a bowl. Woodworkers and craftsmen often rely on their personal experience and knowledge of different wood types to make informed decisions about the drill bit size.
They take into account factors such as the desired thickness of the bowl walls, the intended purpose of the bowl, and the overall design of the project. For example, if a woodworker wants to create a deep and sturdy bowl, they might choose a larger drill bit to create a thicker wall. On the other hand, if a more delicate and lightweight bowl is desired, a smaller drill bit can be used to create a thinner wall.
Step-by-Step Process:
Here is a step-by-step process to determine the size of the drill bit for a bowl based on the type of wood or material being used:
- Identify the type of wood or material: Determine whether you are working with a hardwood, softwood, or a different material altogether.
- Assess the hardness and density: Research or consult with experienced woodworkers to determine the hardness and density of the chosen wood or material. This information will help determine the appropriate drill bit size.
- Consider the bowl design and purpose: Decide on the desired thickness and strength of the bowl walls. You can adjust the drill bit size accordingly to achieve the desired outcome.
- Consult drill bit size charts: There are drill bit size charts available that provide recommendations based on the type of material being drilled. These charts can serve as a useful reference point to assist in choosing the appropriate drill bit size.
- Start with a smaller bit and increase gradually (if needed): If you are unsure of the exact size needed, it is often safer to start with a smaller drill bit. You can then enlarge the hole later, if necessary, using larger drill bits.
Examples:
Let's consider two scenarios to illustrate how the type of wood or material affects the size of the drill bit:
Scenario 1: Working with hardwood such as oak
In this case, you would need a larger and stronger drill bit to penetrate the dense and hard oak effectively. A 1-inch or 1 ¼-inch drill bit would be suitable to create a bowl with thicker walls and more substantial construction.
Scenario 2: Working with softwood such as pine
For softer woods like pine, a smaller drill bit can be used. A ¾-inch or 7/8-inch drill bit would be suitable for creating a bowl with thinner walls and a lighter construction.
In conclusion, the type of wood or material being used for a bowl does indeed affect the size of the drill bit required. Harder and denser woods require larger and stronger drill bits, while softer woods can be drilled with smaller and less powerful drill bits. By considering scientific principles, experience, and practical considerations, woodworkers and craftsmen can choose the most appropriate drill bit size to create their desired bowl.
Master the Art of Removing a Screw with No Head Using This Simple Drilling Technique
You may want to see also
Frequently asked questions
Typically, a 1 ½ inch or 2-inch drill bit is recommended to start turning a bowl. This size allows for a stable base and enough room for the tenon or chuck to securely attach the bowl blank to the lathe.
Using a smaller drill bit will compromise the stability of the bowl blank and may result in wobbling or shifting while turning. It is best to use a drill bit that is at least 1 ½ inches in diameter to ensure proper support for the bowl blank on the lathe.
Using a drill bit to create a tenon or recess on the bottom of the bowl blank is not a mandatory step, but it offers several benefits. It provides a secure attachment point for the lathe chuck or faceplate, prevents shifting or wobbling during turning, and allows for easy remounting if necessary.
Yes, there are alternative methods for attaching a bowl blank to the lathe. One option is to use a faceplate or screw chuck to secure the bowl blank directly without the need for a drill bit. Another option is to use a jam chuck, where the bowl blank is held in place by friction between the tailstock and a turned recess on the bottom of the bowl. However, these methods may not provide the same level of stability and ease of remounting as using a drill bit.