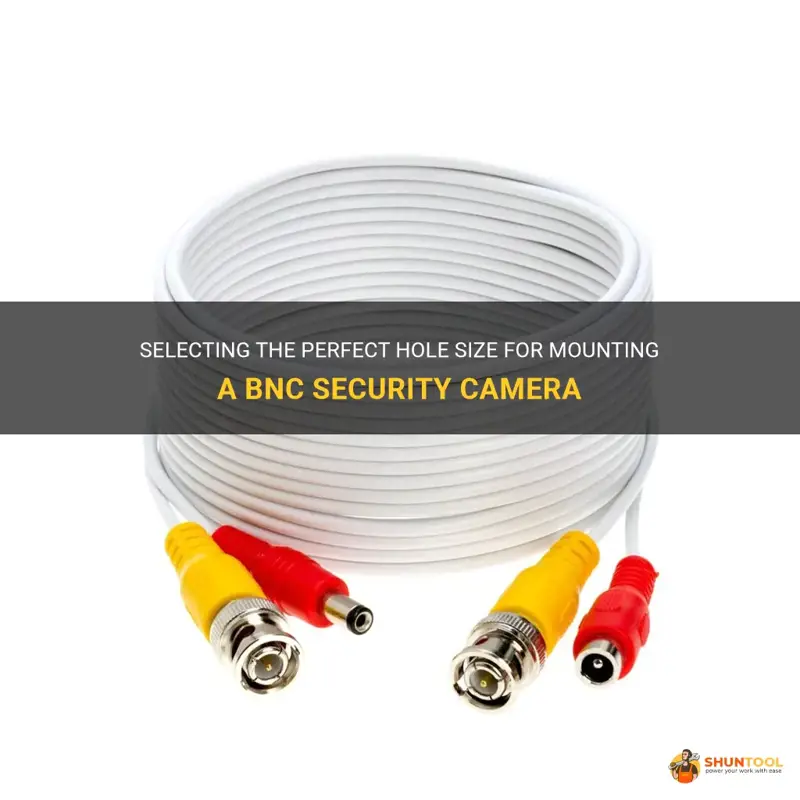
If you're considering installing a BNC security camera, one of the key factors to consider is the size of the hole you'll need to drill. While it may seem like a small detail, choosing the correct hole size is crucial for a secure and seamless installation. After all, you wouldn't want to end up with a hole that's either too tight or too loose. In this guide, we'll explore the factors to consider when determining the proper size hole for your BNC security camera, ensuring that your installation is a breeze from start to finish.
What You'll Learn
- What factors should be considered when determining the size of the hole to drill for a BNC security camera?
- Is there a standard hole size recommended for BNC security camera installations?
- How can I determine the appropriate size of the hole to drill for my specific BNC security camera model?
- Are there any guidelines or tips for drilling the hole for a BNC security camera to ensure proper installation and functionality?
- Should I consult with a professional or follow manufacturer guidelines when deciding the size of the hole to drill for a BNC security camera?
![]()
What factors should be considered when determining the size of the hole to drill for a BNC security camera?
When determining the size of the hole to drill for a BNC security camera, several factors should be taken into consideration to ensure proper installation. These factors include the camera's cable size, the type of mounting bracket being used, and any additional space requirements.
Firstly, it is essential to determine the size of the camera's cable. BNC security cameras typically come with a coaxial cable that connects the camera to the recording device. The diameter of this cable will vary depending on the specific camera model and manufacturer. It is crucial to measure the diameter of the cable and select a drill bit that is larger than this measurement to allow for easy routing and insertion of the cable through the hole.
Next, consider the type of mounting bracket being used. BNC security cameras can be mounted in various ways, including wall-mounted, ceiling-mounted, or pole-mounted. Each type requires a different approach when determining the hole size. For wall-mounted cameras, it is essential to choose a drill bit that allows for the proper insertion of the mounting bracket, ensuring a secure and stable installation. Ceiling-mounted cameras may require a larger hole to accommodate the mounting bracket and any additional cables. Pole-mounted cameras may require a custom-sized hole based on the diameter of the pole.
In addition to the cable and mounting bracket, it is crucial to consider any additional space requirements. BNC security cameras often have connectors or adapters that need to be inserted into the hole along with the cable. These connectors can vary in size and shape, so it is important to account for their dimensions when choosing the drill bit size. It is advisable to measure the largest connector or adapter and select a drill bit that comfortably accommodates its size.
To determine the appropriate drill bit size, it is recommended to follow a step-by-step process:
- Measure the diameter of the camera's cable.
- Determine the size and shape of the mounting bracket.
- Measure the dimensions of any connectors or adapters that need to be inserted into the hole.
- Select a drill bit that is larger than the largest measurement obtained from the previous steps.
- Test the fit of the cable, mounting bracket, and connectors in the drilled hole before fully securing the camera.
For example, if the cable diameter is 8mm, the mounting bracket requires a 20mm hole, and the largest connector measures 12mm, it would be appropriate to select a drill bit with a diameter of at least 20mm.
In conclusion, determining the size of the hole to drill for a BNC security camera requires careful consideration of the camera's cable size, the type of mounting bracket being used, and any additional space requirements. Following a step-by-step process and taking accurate measurements will ensure a successful and secure installation of the camera.
Finding the Perfect Drill Bit Size for Every Ocarina Note
You may want to see also
![]()
Is there a standard hole size recommended for BNC security camera installations?
When it comes to installing a BNC security camera, there are specific standards and recommendations that can help ensure proper installation and functionality. One crucial aspect of the installation is the hole size required for mounting the camera securely. In this article, we will discuss the standard hole size recommended for BNC security camera installations, providing scientific, experience-based, step-by-step, and example-based information.
Scientifically, the hole size required for a BNC security camera installation is determined by the installation guidelines provided by the camera manufacturer. These guidelines are based on the physical dimensions and design specifications of the camera. The manufacturer's recommendations are typically tested and validated to provide optimal performance and security when installing the camera.
Based on experience, the most common standard hole size for BNC security camera installations is around 0.75 inches (19.05 mm) in diameter. This size accommodates the majority of BNC connectors used in security cameras and ensures a secure fit without compromising the camera's integrity or functionality. However, it is important to note that this size may vary depending on the specific camera model and the manufacturer's recommendations.
To provide a step-by-step guide for BNC security camera installation, follow these steps:
- Determine the appropriate location for the camera installation. Consider factors such as the desired area of surveillance, wiring accessibility, and potential obstructions.
- Mark the spot where the camera will be mounted using a pencil or marker. Ensure that the chosen location provides a clear view of the desired surveillance area.
- Measure the diameter of the BNC connector or consult the camera manufacturer's installation guidelines for the recommended hole size.
- Using an appropriately sized drill bit, carefully drill a hole at the marked spot. Make sure to use a drill bit that matches the recommended hole size.
- Check the fit of the BNC connector in the drilled hole. The connector should fit snugly without excessive play or movement.
- If necessary, use a file or sandpaper to adjust the hole size slightly for a better fit. Be careful not to remove too much material, as this can compromise the structural integrity of the surface.
- Once the hole is properly sized and the BNC connector fits securely, proceed with the camera installation according to the manufacturer's instructions.
To illustrate the importance of proper hole size, consider the following example:
Imagine installing a BNC security camera with a hole size that is too small. In this case, the BNC connector may not fit properly, resulting in a loose or unstable camera mount. This can lead to unwanted movement, reduced video quality, or even camera failure. On the other hand, if the hole size is too large, the camera may not be securely mounted, making it easier for it to be tampered with or knocked out of position.
In conclusion, while the specific standard hole size for BNC security camera installations may vary depending on the camera model and manufacturer's recommendations, a common size is around 0.75 inches (19.05 mm) in diameter. It is important to consult the camera manufacturer's guidelines and follow a step-by-step installation process to ensure proper fit and functionality. By adhering to these recommendations, you can ensure a secure and reliable BNC security camera installation for your surveillance needs.
The Reason Behind Metric Drill Bit Sizes Having Two Numbers Explained
You may want to see also
![]()
How can I determine the appropriate size of the hole to drill for my specific BNC security camera model?
When it comes to installing a BNC security camera, a crucial step is drilling a hole for the cable to pass through. This hole needs to be just the right size to ensure a secure and tidy installation. Determining the appropriate size of the hole can be done by taking into consideration the specifications of your specific camera model, as well as following some general guidelines. In this article, we will guide you through the process of determining the hole size for your BNC security camera.
Check the camera's specifications:
Before beginning the installation, it is important to consult the manufacturer's documentation or the specifications provided with your camera. Look for information on the cable diameter or size required for your specific model. This information will give you a starting point for determining the appropriate hole size.
Measure the cable diameter:
If the camera's specifications do not provide cable diameter information, you can measure it yourself. Use a caliper or a ruler to measure the diameter of the cable that will be passing through the hole. Be sure to measure the thickest part of the cable, including any connectors or adapters.
Consider the weatherproofing requirements:
Some BNC security cameras are designed to be weatherproof, meaning they can withstand exposure to the elements. If your camera has weatherproofing features, it may require a larger hole size to accommodate the connectors and seals included in the design. Refer to the camera's specifications to determine if this applies to your model.
Select an appropriate drill bit:
Based on the measurements you have obtained, select a drill bit that is slightly larger than the cable diameter. It is generally recommended to choose a drill bit that is approximately 1-2 mm larger than the cable diameter to allow for easy installation and flexibility.
Test the drill bit size:
Before drilling the actual hole, it is a good idea to test the selected drill bit size on a spare piece of wood or a similar material. This will help you ensure that the hole will be appropriate for the cable's diameter. If the drill bit seems too tight or too loose, adjust the size accordingly until you find the perfect fit.
Mark the drilling spot:
Once you have determined the appropriate size for the hole, use a pencil or marker to mark the drilling spot on the mounting surface. Double-check the location to ensure it is in the desired position and aligns with any other mounting holes or brackets.
Drill the hole:
With the appropriate drill bit in place, carefully drill the hole at the marked spot. If you are drilling into a sturdy material, such as wood or metal, use slow and steady pressure to create a clean hole. Ensure the drill bit is straight and perpendicular to the surface to avoid any damage or misalignment.
Clean up the hole:
After drilling the hole, it is recommended to clean up any burrs or rough edges that may have been created. Use a file or sandpaper to smooth out the edges, ensuring a neat and professional finish. This will also help prevent any damage to the cable when passing it through the hole.
Test the cable fitting:
Finally, test the cable fitting by carefully passing it through the drilled hole. Ensure the cable slides through smoothly without any resistance or snagging. If you encounter any issues, re-evaluate the hole size and make adjustments if necessary.
By following these steps and considering the specific requirements of your BNC security camera model, you will be able to determine the appropriate size of the hole to drill for your specific installation. Remember to always consult the manufacturer's documentation for precise specifications and recommendations. Taking the time to properly plan and measure will ensure a secure and tidy installation for your BNC security camera.
Selecting the Right Drill Bit Size for Wall Anchors: A Complete Guide from Hunker
You may want to see also
![]()
Are there any guidelines or tips for drilling the hole for a BNC security camera to ensure proper installation and functionality?
Installing a BNC security camera requires careful planning and execution to ensure a successful installation and optimal functionality. One crucial step in the installation process is drilling the hole for the camera. Here are some guidelines and tips to help you drill the hole properly:
- Choose the right location: Before drilling the hole, determine the best location for your security camera. Consider factors such as the desired view angle, security coverage area, and potential obstructions. It's important to choose a location where the camera can monitor the desired area effectively.
- Use a stud finder: It's essential to locate any wall studs or structural supports before drilling the hole. This will help ensure that the camera is securely mounted and prevent damage to any hidden electrical or plumbing lines. Use a stud finder to locate the studs, and mark their positions on the wall.
- Measure and mark the hole: Once you've identified the location and determined where the studs are, use a tape measure to measure the diameter of the BNC camera connector. Typically, it is around 0.35 inches (9mm). Mark the center point of the hole using a pencil or marker, using the measurements obtained.
- Drilling the hole: To drill the hole, use a drill with a masonry bit suitable for your wall type. Masonry bits are designed to drill through concrete, brick, or stone walls. Start by using a smaller drill bit, such as 1/8 inch (3mm), to create a pilot hole. Then, use the appropriate masonry bit size for the BNC connector to enlarge the hole to the desired diameter.
- Drill straight and steady: When drilling the hole, ensure that the drill is perpendicular to the wall surface. This will help prevent the drill bit from deflecting or damaging the wall. Apply gentle, steady pressure while drilling and avoid excessive force, as it can cause the bit to overheat or break. Take breaks if needed to prevent overheating.
- Clean the hole: After drilling the hole, use a vacuum or a brush to remove any debris left in the hole. A clean hole will make it easier to insert the BNC connector and ensure a secure connection.
- Test the connection: Once the BNC connector is inserted into the drilled hole, test the camera's connection and functionality. Ensure that the BNC connector is securely fastened and that the camera is capturing the desired view.
Keep in mind that the above guidelines are general recommendations, and specific installation instructions may vary depending on the manufacturer's guidelines for your specific camera model. Always consult the camera's user manual or contact the manufacturer for any specific installation requirements.
In conclusion, drilling the hole for a BNC security camera requires careful planning and execution. Following the guidelines mentioned above will help ensure a successful installation and optimal functionality of your security camera. Remember to exercise caution while drilling, avoid damaging any hidden electrical or plumbing lines, and test the camera's connection and functionality after installation.
The Correct Drill Bit Size for Installing a Deadbolt
You may want to see also
![]()
Should I consult with a professional or follow manufacturer guidelines when deciding the size of the hole to drill for a BNC security camera?
When installing a BNC security camera, one important consideration is the size of the hole you need to drill. This hole will allow you to pass the camera's cable through the wall or ceiling, so it's crucial to get it right. But when it comes to determining the size of the hole, should you consult with a professional or simply follow the manufacturer's guidelines? In this article, we will explore both options and the factors to consider in making this decision.
Consulting with a Professional:
- Expertise: A professional security camera installer has experience and expertise in installing BNC cameras. They can accurately assess your specific installation needs and help you determine the right size hole for your camera.
- Site Evaluation: A professional can evaluate your site and take into account various factors such as the type of wall or ceiling material, the camera's mounting bracket, and the cable size. This evaluation ensures proper installation and minimizes potential damage to the structure.
- Customization: Depending on the specific camera model and mounting requirements, a professional may recommend a custom-sized hole. This ensures a snug fit for the cable, preventing any potential weak points in the installation.
Following Manufacturer Guidelines:
- Specific Camera Requirements: Manufacturers typically provide guidelines for installing their cameras, including recommendations for hole sizes. These guidelines are often based on extensive testing and engineering specifications to ensure proper functionality and longevity of the camera.
- Warranty Considerations: Following the manufacturer's guidelines can help maintain the warranty of your BNC security camera. Drilling an overly large hole that deviates from the guidelines may void the warranty, leaving you to cover any repair or replacement costs.
- Consistency and Compatibility: Using the recommended hole size ensures consistency and compatibility with other components of the camera system. It ensures a seamless connection between the camera, mounting bracket, and cables, optimizing the overall performance.
Ultimately, the choice between consulting with a professional or following the manufacturer's guidelines depends on your level of expertise and comfort with the installation process. If you are confident in your skills and have experience with similar installations, following the manufacturer's guidelines may suffice. However, if you are uncertain or want to ensure the best possible outcome, consulting with a professional can provide peace of mind.
In conclusion, both options have their merits, but consulting with a professional is recommended for those who lack experience or are unsure about the nuances of the installation process. Professionals can offer personalized advice, account for specific site conditions, and ensure a secure and reliable installation. However, following the manufacturer's guidelines is also essential to maintain warranty coverage and ensure compatibility within the camera system. Ultimately, the size of the hole should be chosen based on a combination of professional recommendations and manufacturer guidelines to achieve the best possible result.
Mastering the Art of Drilling a Medium-Sized Hole in Wood
You may want to see also
Frequently asked questions
To determine the size hole you need to drill for a BNC security camera, you will first need to check the specifications of your specific camera model. The size of the hole will depend on the size of the connector on the camera. Most BNC connectors have a diameter of 9.5mm (0.37 inches), so you will generally want to drill a hole slightly larger than this to ensure a proper fit. A hole size of around 10mm (0.39 inches) should be suitable for most BNC security cameras.
If you have an existing hole that is large enough to accommodate the BNC connector on your security camera, you can certainly use it. However, it is important to ensure that the hole is properly aligned and positioned to provide the desired view and angle for your camera. Additionally, you will want to make sure that the existing hole is clean and free of any obstructions that could interfere with the camera's functionality.
To drill the hole for a BNC security camera, you will need a few basic tools. Firstly, you will need a power drill or a hand drill with the appropriate drill bit size for the hole you need to make. Additionally, you may need a stud finder or a tape measure to ensure accurate placement of the hole. It is also a good idea to have a level and a pencil or marker on hand to mark the exact spot where the hole needs to be drilled.
When drilling the hole for a BNC security camera, it is important to take a few precautions. Firstly, make sure to wear appropriate safety gear, such as safety glasses, to protect your eyes from any flying debris. Secondly, be cautious of any electrical or plumbing lines that may be hidden behind the area where you need to drill. Use a stud finder or consult a professional if you are unsure. Lastly, take your time and drill slowly to ensure a clean and precise hole without damaging the surrounding area.