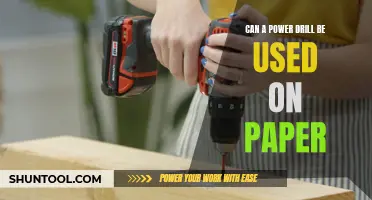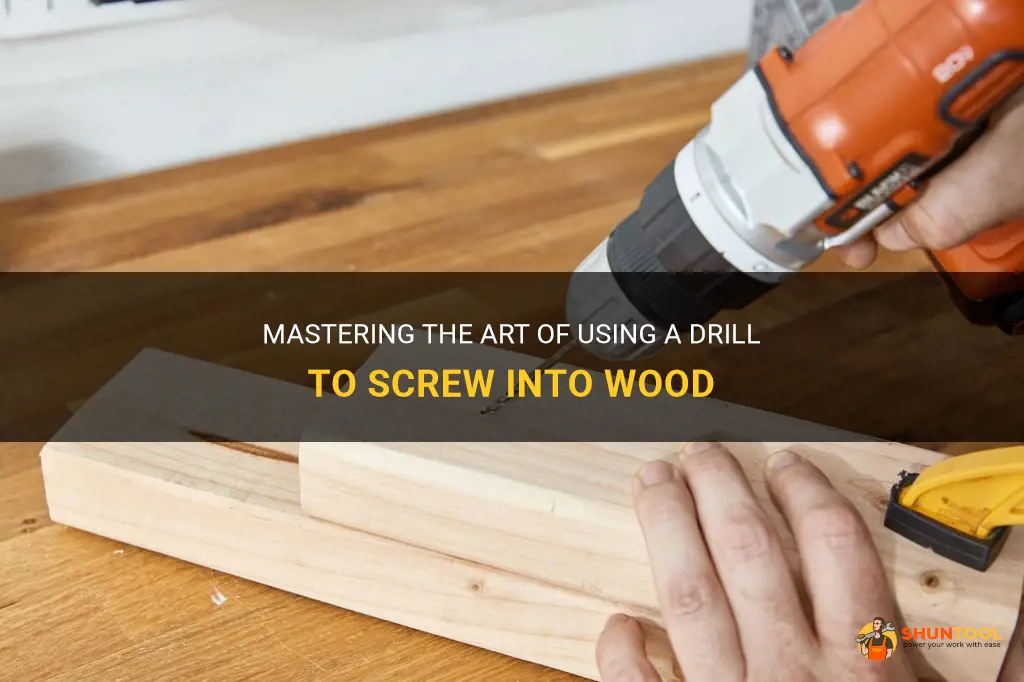
Have you ever had trouble screwing into wood without damaging it? Using a drill can make this task much easier and more efficient. Whether you are a professional carpenter or a DIY enthusiast, knowing how to properly use a drill to screw into wood is an essential skill. In this guide, we will explore the step-by-step process of using a drill for screwing into wood, giving you the expertise to tackle any woodworking project with confidence. So, grab your drill and let's get started on this woodworking adventure!
| Characteristics | Values |
|---|---|
| Drill type | Cordless drill |
| Drill bit type | Phillips bit |
| Drill speed | Low speed |
| Screw type | Wood screw |
| Screw size | Appropriate size for the wood thickness |
| Drill direction | Clockwise |
| Drill pressure | Firm but not excessive |
| Pilot hole | Optional, but recommended for hardwoods |
| Depth setting | Set to slightly below the surface of the wood |
| Screwdriver bit | Optional, but can be used for final tightening |
What You'll Learn
- What type of drill bit should be used for screwing into wood?
- What speed setting should the drill be set to when screwing into wood?
- Should a pilot hole be drilled before screwing into wood, and if so, what size should it be?
- How deep should the screw be driven into the wood using the drill?
- Are there any safety precautions to keep in mind when using a drill to screw into wood?
![]()
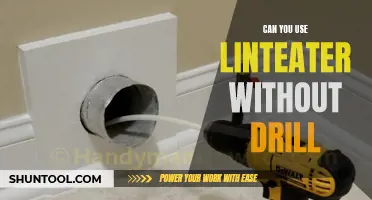
What type of drill bit should be used for screwing into wood?
When it comes to screwing into wood, using the right drill bit is important for achieving a clean and secure installation. The type of drill bit you use will depend on the size and type of screw you are using, as well as the type of wood you are working with.
One of the most common types of drill bits used for screwing into wood is a countersink bit. This type of bit has a tapered tip that creates a recess for the screw head, allowing it to sit flush with the surface of the wood. Countersink bits are often used when working with wood that will be painted or stained, as they create a clean and professional finish.
If you are working with harder woods, such as oak or maple, you may want to consider using a pilot hole bit. These bits have a sharp, pointed tip that helps to guide the screw into the wood without splitting it. Pilot hole bits are especially useful when working with larger screws or when screwing close to the edge of the wood.
For softer woods, such as pine or plywood, a regular twist drill bit can be used. These bits have a sharp, twisted tip that helps to bore into the wood, creating a hole for the screw. Twist drill bits are available in various sizes to accommodate different screw sizes.
In some cases, you may also need to use a dowel bit when screwing into wood. Dowel bits are specifically designed for creating holes to insert dowels, which are cylindrical wooden rods often used for joining pieces of wood together. These bits are available in various sizes to accommodate different dowel sizes.
Now that we know the different types of drill bits that can be used for screwing into wood, let's go through a step-by-step process for using them:
- Determine the size of the screw and select the appropriate drill bit. The drill bit should be slightly smaller than the diameter of the screw, allowing for a tight fit.
- Mark the location where the screw will be inserted. Use a pencil or a small awl to make a small indentation in the wood, which will act as a guide for the drill bit.
- Attach the drill bit to your drill or drill press, making sure it is securely tightened.
- Place the tip of the drill bit on the marked spot and slowly apply pressure to start drilling. Use a steady, controlled motion to drill into the wood.
- Drill to the desired depth, taking care not to go too deep and accidentally go through the other side of the wood.
- Once the hole is drilled, insert the screw into the hole and use a screwdriver or drill to drive it into the wood. If using a countersink bit, make sure the screw head sits flush with the surface of the wood.
By following these steps and using the appropriate drill bit, you can ensure a clean and secure installation when screwing into wood. Remember to always wear safety goggles and exercise caution when using power tools.
Mastering the Art of Using an Angle Drill Guide
You may want to see also
![]()
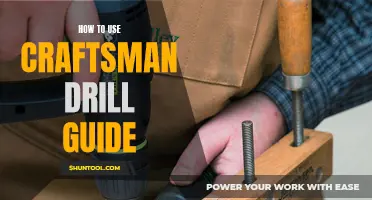
What speed setting should the drill be set to when screwing into wood?
When it comes to screwing into wood, it is essential to choose the right speed setting on your drill to ensure optimal results. The speed setting determines how fast the drill bit rotates, and choosing the correct speed can prevent the wood from splitting and ensure a secure screw connection.
In general, when screwing into wood, it is recommended to set the drill to a lower speed setting. This will allow for more control and reduce the risk of the drill bit slipping or the screw becoming misaligned. A lower speed setting also reduces the likelihood of the wood splitting, especially when working with hardwood or dense materials.
The exact speed setting will depend on the type and size of the screw being used, as well as the density of the wood. In general, a medium or low speed setting is suitable for most wood screwing applications. For larger screws or denser wood, a slower speed setting may be necessary to avoid damaging the wood.
Using a drill with variable speed settings can provide even greater control. This allows for adjustments to be made depending on the specific task at hand. For example, when starting a screw, it is advisable to start at a low speed to ensure accurate placement. As the screw is being driven into the wood, the speed can be gradually increased to finish the job efficiently.
It is important to note that different types of drills may have different speed settings. Some drills have a range of speed settings, while others offer only high and low options. It is essential to consult the user manual of your particular drill to determine the appropriate speed settings for screwing into wood.
Experience and practice are also valuable in determining the right speed setting for screwing into wood. Over time, you will develop a feel for the drill and understand how different speed settings affect the performance. It is recommended to experiment with different speed settings on scrap pieces of wood before working on a project to ensure you are comfortable and confident in your choice.
To illustrate the importance of speed settings when screwing into wood, let's consider an example. Suppose you are building a wooden bookshelf and using 2-inch wood screws. The wood is of average density. In this scenario, setting your drill to a medium speed setting would be appropriate. This will give you enough control to start the screws accurately and drive them into the wood without splitting it.
In conclusion, when screwing into wood, selecting the right speed setting on your drill is crucial. Lower speed settings are generally recommended to prevent damage to the wood and ensure a secure screw connection. The specific speed setting will depend on factors such as screw size, wood density, and the type of drill being used. Practice and experience will help you determine the best speed setting for various wood screwing applications.
Exploring the Drill Features in Club Penguin: A Comprehensive Guide
You may want to see also
![]()
Should a pilot hole be drilled before screwing into wood, and if so, what size should it be?
When it comes to screwing into wood, the use of a pilot hole is often recommended, especially when dealing with hardwoods or when working with larger screws. So, should a pilot hole be drilled before screwing into wood, and if so, what size should it be? Let's delve into this topic and shed some light on the matter.
First and foremost, let's understand what a pilot hole is and why it is necessary. A pilot hole is a small-diameter hole that is drilled into the wood before driving in a screw. Its purpose is to create a guide for the screw, allowing it to easily and accurately enter the wood without splitting or cracking the material. Without a pilot hole, the screw may apply too much force and cause the wood to split, which would compromise the structural integrity of the project.
The size of the pilot hole depends on a few factors, including the type of wood, the diameter of the screw, and the length of the screw. As a general rule of thumb, the pilot hole should have a diameter that is slightly smaller than the diameter of the screw. For example, if you are working with a 1/4-inch screw, it is recommended to drill a pilot hole that is around 3/16 inches in diameter. This allows the screw to grip the wood securely while preventing it from splitting.
However, it is important to note that different wood species have varying levels of hardness. Hardwoods, such as oak or maple, usually require a larger pilot hole compared to softer woods like pine or cedar. The hardness of the wood can also be affected by its moisture content, so it is essential to take these factors into consideration when determining the size of the pilot hole.
To determine the appropriate pilot hole size, you can refer to a pilot hole chart, which provides guidelines based on screw diameter and wood species. These charts can be found online or in woodworking books and are a valuable resource for ensuring proper screw installation.
Now let's talk about the process of drilling a pilot hole. Here is a step-by-step guide:
- Mark the location where you want to insert the screw. Use a pencil or a marker to make a small dot on the wood surface.
- Select the drill bit that matches the desired pilot hole size. Ensure that the drill bit is sharp and in good condition.
- Attach the drill bit to your drill machine, making sure it is secured tightly.
- Place the tip of the drill bit on the marked spot and hold the drill perpendicular to the wood surface.
- Start the drill and begin drilling slowly. Apply steady pressure and let the drill bit do the work. Avoid forcing the drill or applying excessive pressure, as this can lead to splitting or damaging the wood.
- Continue drilling until the desired depth is reached. The depth of the pilot hole should be slightly shorter than the length of the screw.
- Remove the drill bit from the hole and clean any wood chips or debris.
- Now, you are ready to insert the screw into the pilot hole. Start by aligning the screw with the hole and gradually drive it in using a screwdriver or a power tool. Ensure that the screw goes in straight and does not strip the wood.
By following these steps and considering the appropriate pilot hole size, you can ensure that your screw installation is secure and hassle-free. Remember to always measure and align your pilot holes accurately to achieve optimal results, especially when working on delicate projects or with valuable pieces of wood.
In conclusion, drilling a pilot hole before screwing into wood is highly recommended to prevent splitting or damaging the material. The size of the pilot hole should be slightly smaller than the screw diameter, and it may vary depending on the wood species and screw length. Taking the time to drill a pilot hole can save you from potential headaches and ensure a successful woodworking project.
The Ultimate Drill Checklist for DIY Enthusiasts
You may want to see also
![]()
How deep should the screw be driven into the wood using the drill?
When using a drill to drive screws into wood, it is important to know how deep the screw should be driven in order to achieve the desired result. The depth at which the screw is driven can affect the strength and stability of the connection, as well as the appearance of the finished project.
The depth at which a screw should be driven into wood can vary depending on the type and thickness of the wood, as well as the size and type of screw being used. In general, the screw should be driven so that the head of the screw is flush with the surface of the wood or slightly below. This ensures that the screw provides a secure hold while also appearing neat and flush with the wood.
To determine the correct depth to drive the screw, you can use a few methods. One method is to use a depth gauge attachment on your drill. This attachment allows you to set a desired depth and ensures that the screw is driven to the same depth each time. Another method is to use a piece of scrap wood as a guide. Place the scrap wood next to the screw and drive the screw until it is just below the surface of the scrap wood. This will give you an indication of how deep the screw should be driven into the wood.
It is important not to drive the screw too deep into the wood, as this can weaken the connection and cause the wood to split. If the screw is driven too deep, it may not provide a secure hold and could potentially pull out of the wood over time. If you accidentally drive a screw too deep, you can use a countersink bit to create a larger hole for the screw head to sit flush with the surface of the wood.
On the other hand, if the screw is not driven deep enough, it may not provide enough support and the connection may be weak. The screw head should be flush with the surface of the wood or just slightly below, ensuring that the screw is securely fastened without causing any damage to the wood.
In addition to the depth, it is also important to consider the angle at which the screw is driven. The screw should be driven in straight, without any angle, to ensure a secure and stable connection. Driving a screw at an angle can weaken the connection and cause the screw to pull out of the wood.
To summarize, when using a drill to drive screws into wood, it is important to drive the screw to the correct depth. The depth should be such that the screw head is flush with the surface of the wood or slightly below. This ensures a secure hold while also providing a neat and finished appearance. Methods such as using a depth gauge attachment or a piece of scrap wood can help determine the correct depth. It is important not to drive the screw too deep or too shallow, as this can weaken the connection or result in a weak hold. By considering the depth and angle at which the screw is driven, you can ensure a strong and stable connection when using a drill to drive screws into wood.
Master the Art of Sharpening Drill Bits with These Easy Steps
You may want to see also
![]()
Are there any safety precautions to keep in mind when using a drill to screw into wood?
When using a drill to screw into wood, there are several safety precautions that should be kept in mind to ensure a safe and successful project. Whether you are a professional or a DIY enthusiast, following these precautions is essential to prevent accidents and mishaps. In this article, we will discuss some important safety measures to consider.
Use appropriate safety gear:
Wearing the right safety gear is crucial when using power tools like drills. Make sure to wear safety glasses to protect your eyes from flying debris. Additionally, it is advisable to wear ear protection if you will be working with a high-powered drill for an extended period to prevent hearing damage. Lastly, always keep your hands and fingers away from the drill bit and rotating parts to avoid any injuries.
Inspect the drill and accessories:
Before starting any drilling project, it is important to thoroughly inspect the drill, drill bits, and screws you plan to use. Check for any damage or defects in the tools, and if necessary, replace them immediately. Using damaged equipment can lead to accidents and result in poor-quality work.
Choose the right drill bit:
Using the correct drill bit for the type of wood you are working with is crucial for a successful project. Different types of wood require different drill bits, and using the wrong one can lead to a botched job or potential damage to the wood. Ensure that the drill bit is sharp, clean, and appropriate for the type of screw you plan to use.
Secure the workpiece:
To prevent accidents and ensure accurate drilling, it is essential to secure the workpiece properly. Use clamps or a vice to hold the wood firmly in place, preventing it from moving or spinning during drilling. This will ensure that the drill remains steady and that the screws have a solid grip.
Take your time:
When using a drill, it is important not to rush. Take your time to carefully position the drill bit on the wood and apply steady pressure when drilling. Rushing the process can lead to slipping, which can cause damage to the wood or result in injuries. Use a controlled and steady speed to achieve the desired results.
Practice proper technique:
Using the drill correctly is essential for safety and efficiency. Keep a firm grip on the drill, making sure your hands are away from the drilling area. Position the drill perpendicular to the wood surface and apply steady pressure while drilling. Avoid forcing the drill or applying excessive pressure, as this can cause the bit to break or the wood to splinter.
Clean up:
After completing the drilling task, make sure to clean up the work area. Remove any wood chips or debris that may have accumulated during the process. This will help prevent slips and falls and also ensure the drill is ready for the next use.
In conclusion, using a drill to screw into wood requires careful consideration of safety measures. By wearing appropriate safety gear, inspecting the tools, selecting the right drill bit, securing the workpiece, taking your time, practicing proper technique, and cleaning up after the task, you can ensure a safe and successful drilling experience. Always remember to prioritize safety to prevent accidents and enjoy a smooth and successful woodworking project.
Using a Corded Hammer Drill for Driving Screws: What You Need to Know
You may want to see also
Frequently asked questions
To attach a screw to a drill, you will need a screwdriver bit with a matching size to your screw. Insert the bit into the chuck of your drill and tighten it securely.
Most drills have adjustable speed settings. For screwing into wood, it is recommended to set the drill to a slow speed to prevent the screw from stripping or splitting the wood. Start with a slow speed and increase if necessary.
First, mark the spot where you want to insert the screw. Use a drill bit slightly smaller than the size of your screw and align it with the mark. Apply gentle pressure and begin drilling, making sure to keep the drill level and perpendicular to the wood surface.
To prevent wood splitting, it is important to pre-drill a pilot hole before screwing. The pilot hole should be slightly smaller than the diameter of the screw. This will help guide the screw and reduce the risk of splitting the wood.
The best technique for screwing into wood with a drill is to start slowly, applying gentle pressure, and gradually increase speed and pressure as needed. It is important to maintain control and keep the drill level and perpendicular to the wood surface to ensure accurate and secure screwing.